Showing Posts From
Api

- 29 Aug, 2026
Ticket Generator: A Practical Guide for Event Organizers
Friday afternoon is where ticket problems get real. The RSVP list keeps growing, the venue wants names on every pass, and the same static PDF suddenly has to carry seat numbers, QR codes, and different access tiers without turning into a manual editing marathon. A ticket generator solves the middle of that workflow. It takes the artwork and separates it from the data, so the design stays fixed while names, codes, and ticket numbers change per attendee. That distinction matters because a pretty PDF alone doesn't help with reissue, batch creation, or clean handoff to the tools that scan and validate entries. Table of ContentsWhy You Need a Ticket Generator Beyond a Pretty PDF The operational gap a PDF can't closeDesigning the Ticket Template for Reliable Scanning Start with the fields that matter Make the scan zone part of the designRendering Tickets With the API Bytes or hosted linkBulk Generation From a CSV Without Writing Code What the sheet has to get right What bulk generation is really forPlan Limits and What They Mean for Real Events What to compare before choosingBest Practices for Print, Validation, and Revoking Links Treat print settings as part of the ticket Treat links as revocable assetsWhere a Ticket Renderer Ends and Event Ops BeginsWhy You Need a Ticket Generator Beyond a Pretty PDF A static PDF works only when every ticket can be identical. The moment an organizer needs unique numbers, personalized names, or different access levels, that approach starts forcing manual edits, duplicate files, and too much room for error. A real ticket generator treats the design as a template and the attendee list as data. That separation means the same layout can render hundreds of unique tickets without rebuilding each file by hand. It also makes operational changes much easier, because a seat change, sponsor swap, or added note can be reflected in the next render instead of forcing a redesign from scratch.The operational gap a PDF can't close The need for numbered tickets isn't new. Ticketing has roots in ancient theaters and Roman event control systems, then moved toward more structured admission control in 1755, when theatre managers in London began issuing pre-paid tickets or “checks” to track attendance and revenue more accurately, according to this history of event ticketing systems. Paper tickets with perforated stubs later made large-scale admission practical, and online ticketing pushed the workflow into the digital era. That history points to the same lesson every event team eventually learns. The ticket isn't just a graphic, it's an operational record. A useful generator produces the artwork, but the downstream systems still need to handle scanning, check-in, sales, and fraud controls.Practical rule: if a ticket can't be uniquely identified, reissued cleanly, and scanned reliably, it's still just a flyer with a code on it.The market reflects that shift. One industry summary pegs total ticketing transaction value at $1.47 trillion in 2025 and projects $3.37 trillion by 2030 (source), which shows how far ticketing has moved beyond a back-office print job. That scale is exactly why the generator should handle the file creation step and leave live entry operations to the systems built for them.Designing the Ticket Template for Reliable Scanning A ticket can look polished and still fail at the door. The usual problem is not the artwork. The layout was built like a flyer, while the event team still needs structured data for validation, reissue, and scan checks.Start with the fields that matter A usable ticket template should reserve space for the attendee name, ticket ID or order number, event date, door time, venue, seat or section, and one unique code per ticket. In a template-based generator, those values bind to variables such as {{attendee_name}}, {{ticket_id}}, {{seat}}, and the code field, then render separately for each row. Images bind the same way, which matters if the ticket needs a sponsor logo, badge art, or a personalized QR asset. A spreadsheet-first organizer usually feels this pain first, because one empty cell or malformed value turns into a bad batch after export. That is why the template needs validation rules before the first file is generated. Numeric fields should stay numeric, date fields should follow one format, and required placeholders should never be blank. Developers can wire that into the data pipeline. Nontechnical teams can catch the same issues by checking columns before upload.Make the scan zone part of the design QR codes and barcodes should not be dropped into a corner at the end. They need a quiet zone, strong contrast, and enough physical size to scan quickly on a handheld device. A folded lanyard or a dim venue entrance can still make a weak code fail, even if the ticket looks clean on screen. The design step and the operational step serve different jobs. The artwork controls layout, type, and branding. The operations layer handles the code, validation, revocation, and the check-in flow. A template renderer can place the scan asset correctly, but it does not replace the door app or the rules around admission. For teams using Zandovi, the ticket templates separate editable artwork from per-ticket data binding, which keeps design work from drifting into operations work. That split matters whether you are building from an API or filling rows in a spreadsheet. The template should produce a print-ready file with stable spacing, legible text in PDF export, and the same layout for the same inputs. If the code shifts, the font changes unpredictably, or the fields wrap at random, the door team feels it first.Rendering Tickets With the API Developers usually want the shortest possible path from registration data to a finished file. The clean pattern is a single POST per ticket, with the template ID in the request and the attendee fields in a JSON object that matches the template variables. A minimal call looks like this in practice. The body carries template_id: "tpl_conf_2025" and a data object such as attendee_name, ticket_id, seat, and qr_payload, then the renderer returns the finished ticket. The important decision is delivery format, because the same render can produce bytes or a hosted link depending on how the file is going to move through the rest of the event stack.Bytes or hosted link Bytes make sense when the ticket is going straight into an order confirmation email, a download attachment, or a file pipeline the team already controls. That path keeps the artifact under the organizer's own domain and avoids extra handoffs. Hosted links fit reissue workflows better. A forwarded link can be regenerated or revoked later, which is useful when a guest loses a ticket or a door team needs a new pass on short notice. Zandovi's render API does this by default with server-side Skia rendering, not a headless browser, which keeps the result deterministic rather than generative. One practical warning matters here. The API renders and delivers files, but it doesn't run payment processing or gate validation. Those belong to downstream systems that ingest the output and decide what happens at purchase, scan, or revocation time.A render endpoint should behave like a printer with an API, not like a ticketing platform pretending to be one.That boundary saves engineering time. It also keeps the integration simple enough for event registration flows, confirmation emails, and last-minute reprints without mixing rendering logic into check-in logic.Bulk Generation From a CSV Without Writing Code Spreadsheet-first organizers usually don't start with an API. They start with a list from Eventbrite, a Mailchimp export, or a hand-cleaned Google Sheet that needs to become hundreds of individualized tickets before the volunteer crew shows up. The workflow is straightforward. Upload the CSV, map each column to the matching template variable, and let the renderer produce one output per row. In tools built for this job, the finished files are often packaged as a ZIP so the whole batch can be downloaded in one shot.What the sheet has to get right The row structure matters more than the file format. Each attendee should have one row, and that row needs the exact values the template expects, including the unique code and whatever field the event uses for numbering or access control. If a name is missing or a code is duplicated, the generator should fail that row before the tickets go out. Output naming is part of the operational flow too. A pattern such as {{ticket_type}}-{{code}}.pdf helps staff sort stacks by tier or section without opening every file. That sounds small, but it's the kind of detail that makes printed packets usable at the door.What bulk generation is really for Template rendering differs from a marketing design tool. The value isn't fancy graphics, it's turning a list into a consistent set of files that match the sales list, the attendee list, or the registration export. The best bulk workflow is the one that keeps data hygiene intact and reduces manual cleanup before the event. Bulk generation also connects to scale. A separate guide on how to number event tickets covers the numbering pattern itself, while the batch path handles the repeatable file creation. Together, those pieces make it possible to move from a spreadsheet to a zipped set of printable, auditable tickets without scripting. The trade-off is simple. If the spreadsheet is messy, the output will be messy too. The generator can only protect against bad rows if the source data is clean enough to validate.Plan Limits and What They Mean for Real Events The right plan depends on the actual attendee list, not the hope that the event will stay small. A workshop, a conference, and a membership program stress a generator in different ways, especially once batch size and render volume start to matter.Plan Monthly renders CSV batch size Delivery options Custom domainFree 100 25 rows/job API and hosted link NoPersonal 5,000 100 rows/job API and hosted link NoStudio 12,000 200 rows/job API and hosted link NoTeam 25,000 300 rows/job API and hosted link NoBusiness 100,000 400 rows/job API and hosted link NoThose limits come from Zandovi's pricing page, and the practical read is easy. Small events fit comfortably into the lower plans, while larger conferences or recurring programs need more room for batch jobs and render volume.What to compare before choosing The first question is batch size. If the attendee export regularly exceeds the job limit, the team will spend too much time splitting uploads. The second is render volume, especially if the same template is reused for reminders, badges, or updated reprints. Paid plans also matter for manual workflow speed. On paid tiers, manual editor exports are unlimited, so a designer can keep iterating without burning through the render pool. That separation between automation usage and editor usage is useful for teams that mix one-off design edits with recurring batch jobs. For many organizers, the safety margin matters more than the headline number. A plan that barely fits a list creates avoidable stress when walk-ins, comped passes, or late additions show up the week of the event.Best Practices for Print, Validation, and Revoking Links A ticket that prints cleanly on a laptop screen can still fail once it hits real paper and real lighting. Before anything goes live, the safest move is to test one attendee ticket on paper and scan it under conditions that resemble the entrance, not the design review table.Treat print settings as part of the ticket Print-ready output should be exported with embedded fonts and enough resolution for the printer to hold detail in the code and the text. If a print shop is handling the run, the file should also include bleed so trimming doesn't eat into the artwork. Those settings are boring, but they prevent the most common production mistakes. Validation belongs in the template before the batch starts. Required fields should fail on empty input, email formats should be checked before delivery, and the QR payload should point at the check-in endpoint with the unique code attached. That makes the ticket useful to the scan system instead of just visually complete.Treat links as revocable assets Hosted ticket links should be handled like live URLs, not static files. If a ticket is forwarded to the wrong person or a pass needs to be invalidated, the rendered asset can be revoked with a DELETE action so the old link stops working at the gate. That gives organizers a clean way to rotate access without reissuing every pass. The operational side matters more as fraud risk grows. In ticketing, digital tickets are exposed to abuse more often than physical ones, and Riskified's US-market data shows fraud climbs with ticket price, reaching 3.08% for tickets priced at $51-$115 and more than 20% fraudulent orders above $200 (source). INTIX also reports that just over 5% of attempted digital transactions worldwide are fraudulent (source), which is why a QR image alone isn't enough.Operational rule: if the ticket can't be invalidated, the scan code isn't security, it's just decoration.For a separate badge workflow, the same discipline applies to event badges. The file has to be printable, scannable, and easy to revoke if the entry policy changes.Where a Ticket Renderer Ends and Event Ops Begins A ticket renderer creates the artifact. It binds variables, generates one file per row or one file per request, and returns a ticket that can be printed, emailed, or handed off to another system. That's useful, but it's still only one piece of the event stack. The rest belongs to tools that run the event itself. Payment processing, attendee CRM, scanner hardware, duplicate-scan logic, and real-time gate validation all sit downstream of the render step. The generator produces the artwork with the unique code, then another system decides whether that code opens a door, marks a sale, or gets revoked. For developers, the clean next move is to wire the render API into the registration flow and store the returned file URL or blob in the team's own database. For spreadsheet-first organizers, the cleaner path is to export the finished ZIP and hand it to an existing check-in app, a print shop, or the email vendor already used for attendee communication. That boundary is the whole point. A ticket generator should make tickets accurate, unique, printable, and easy to batch. It shouldn't pretend to be the payment platform, the scanner, or the gate system, because those jobs need different tools.If the next event needs numbered, scannable tickets from a template or a spreadsheet, start by checking whether the current workflow can survive a real attendee list. If it can't, review the template layout, the batch limits, and the render path, then wire the output into the check-in tool already used on site.

- 29 Aug, 2026
Dynamic Images: What They Are and How to Build Them
You're staring at a shared link preview that looks dull, a certificate backlog that needs to be personalized, or an OG card that still says “static image” in practice even though the content changes every day. The phrase dynamic images gets used for three different things, and teams waste time because they pick the wrong tool for the wrong meaning. The three meanings are responsive markup, AI-generated images, and template-driven rendering. This guide uses the third one, the one that fills a reusable design with per-viewer or per-record data to produce things like personalized email graphics, social cards, certificates, tickets, and vouchers.Table of ContentsWhat Dynamic Images Actually Mean The three meanings people mix up The meaning this guide usesThe Template Plus Variables Plus Data Model A concrete example beats a diagram What happens at render timeReal-World Use Cases Worth Building Social cards, emails, and certificates each have different triggers Common wins that don't require a huge buildTechnical Approaches Compared Three ways teams build the same outcomeImplementation Patterns for Developers and Non-Coders Single render first, because the contract is easiest there Batch jobs and no-code CSV flows solve different problemsPerformance, Accessibility and SEO Considerations Format choice changes cost more than teams expect Accessibility and SEO need their own payloadsBest Practices Before You Ship Treat rendering like production infrastructure Handle the failures on purposeChoosing the Right Approach for Your TeamWhat Dynamic Images Actually MeanThe three meanings people mix up Responsive markup is the browser choosing between image files with <picture> and srcset. That's a front-end delivery problem, not a rendering system. If the team needs that path, a responsive image tool belongs in the stack, not a template renderer. AI-generated images are a different category again, where a prompt or reference image goes into a model and a new image comes out. That belongs with generative media tools, not with systems that need deterministic layouts, branded certificates, or repeatable OG cards. The important part is that the output isn't filled from structured fields in a stable template.The meaning this guide uses The useful production meaning is template-driven rendering. A designer or developer builds one layout, names the changing parts, then a render request swaps in data and returns a finished asset. That's what powers personalized email graphics, Open Graph cards, certificates, badges, and vouchers without hand-editing each file.The long history of this format helps explain why it stuck. GIF was released by CompuServe on June 15, 1987, animation arrived with GIF89a in 1989, and browser behavior later helped make looping familiar on the web, while GIPHY's 2016 reporting showed just how far moving imagery had spread online (gift history, GIPHY usage history). That doesn't mean every modern workflow should use GIF, but it does show why people reached for dynamic visuals long before “render pipeline” became a normal phrase. A clean way to think about it is simple. A template plus variables plus data equals one design rendered many ways. Everything else, delivery format, caching, validation, and preview behavior, hangs off that one idea.The Template Plus Variables Plus Data ModelA concrete example beats a diagram Take a 1200x630 OG card. The layout sits on the server once, with a headline slot, an author slot, a logo, and a background. The design doesn't change every time someone asks for a render, only the values do. The variables are named placeholders with types. A headline can be a string, an author can be a string, and a background can be a hex color or a preset name. A single render might receive data like { "headline": "How we shipped X", "author": "Maya", "bg": "#0F172A" }, then map each field into the template.What happens at render time The caller sends the template ID, the data object, and the output format. The server returns either raw image bytes or a hosted URL with the rendered result. Those are different integration shapes, and the choice matters. Bytes fit one-off responses, direct downloads, and places where the caller wants to handle storage itself. A URL fits <meta property="og:image">, email clients, and systems that just need a reference they can embed. A stable render pipeline should also behave idempotently, so the same inputs can be replayed safely without changing the visual output.Practical rule: if the data is stable and the layout is stable, the render should be stable too. If the same inputs produce different pixels, debugging gets painful fast.The WebP format shows why delivery matters. Google documents that animated WebP supports full 24-bit color, 8-bit alpha, and can use lossy or lossless compression, while typically producing smaller files than GIF and decoding faster in many cases (Google WebP FAQ). For team workflows that need crisp transparency and less payload overhead, that difference is not theoretical. Zandovi's dynamic OG image guide and its hosted URL guide reflect this exact contract, template in, data in, bytes or URL out. That is the shape to keep in your head.Real-World Use Cases Worth BuildingSocial cards, emails, and certificates each have different triggers Open Graph images usually fire on page publish or on a request when a preview bot hits the page. The variable set is small, often title, author, category, and a brand color. The deliverable is usually a 1200x630 PNG or WebP referenced from <meta property="og:image">, because link previews need a stable share image. Personalized email graphics work differently. A campaign send or segment update triggers the render, and the variables can include first name, plan tier, and CTA label. The deliverable is usually a hosted URL inserted into <img src>, because email clients do better with a simple asset reference than with inline generation. Certificates and completion badges are more operational. A course completion webhook triggers the render, the variables include recipient name, course title, date, and certificate ID, and the output is a printable PDF plus a verification URL. That pairing matters because a certificate often needs both a presentation layer and a way to prove authenticity later. Tickets and vouchers add another branch. An order or RSVP trigger fills attendee name, seat, event date, and a QR payload. The deliverable is usually a PNG and, in some systems, an Apple or Google Wallet pass. QR codes and barcodes are useful here because the dynamic element isn't just decorative, it carries scannable data that must match the record.Common wins that don't require a huge build Dashboards and social quote cards are usually cheaper to adopt because the trigger is simple and the variable set is small. Teams often ship these first because they're visible, easy to review, and easy to revoke if the design needs a change.Use Case Trigger Key Variables DeliverableOpen Graph image Page publish or request Title, author, category, hero color 1200x630 PNG or WebPPersonalized email graphic Campaign send or segment update First name, plan tier, CTA label Hosted URL in <img src>Certificate Course completion webhook Recipient name, course title, date, certificate ID Printable PDF plus verification URLTicket or voucher Order or RSVP Attendee name, seat, event date, QR payload PNG plus wallet passFor teams maintaining social templates, the internal template library at Zandovi's social media templates page is one concrete place this pattern shows up in practice.Technical Approaches ComparedThree ways teams build the same outcome A server-side template API keeps the rendering logic behind an HTTP boundary. The upside is predictable output, clean scaling, and no browser runtime to babysit. The downside is vendor lock-in risk and the need to trust the provider's template model, font handling, and storage behavior. A headless-browser renderer uses a real browser to render HTML and capture the result. That helps when the design must match an existing web page pixel for pixel, but it also brings cold starts, font loading cost, sandboxing concerns, and queue management. Non-Latin scripts and custom fonts can work well, but only if the team is disciplined about packaging and preload behavior. An HTML-to-image library runs inside app code and converts markup into an image. That can be convenient for prototypes, but layout drift and font mismatch show up quickly when the CSS environment diverges from the browser the design was tested in. It also shifts more rendering responsibility into the application itself.Rule of thumb: pick the simplest system that can keep layout stable under load. Fancy render stacks tend to fail at the seams, not at the happy path.Criterion Server-side template API Headless-browser renderer HTML-to-image librarySetup cost Lower once the API contract is clear Higher because of browser runtime and queueing Lowest to start, higher later when drift appearsPixel determinism Strong for template-based layouts Strong if the browser environment is controlled Weaker when CSS support or fonts driftScaling model API requests and caching Workers, queues, browser pools App process load and memory pressureHosting footprint Small on the caller side Larger because of browser infrastructure Small at first, then grows with usageFonts and scripts Good if the service supports them well Good with careful bundling Varies, often fragile across environmentsBest fit OG cards, certificates, vouchers, batch jobs Pixel-exact page captures Quick demos, simple internal toolsA hosted API with a real editor, such as Zandovi's comparison page against Bannerbear, sits in that first column. The main question isn't whether one approach is universally superior. It's which failure mode the team can tolerate.Implementation Patterns for Developers and Non-CodersSingle render first, because the contract is easiest there A typical REST request looks like this in shape, even when the exact field names vary by vendor: POST /api/render { "templateId": "cert_123", "format": "pdf", "data": { "recipientName": "Jane Doe", "courseTitle": "Secure API Design", "date": "2026-08-29", "certificateId": "CERT-481" }, "assets": { "logo": "https://cdn.example.com/logo.png", "signature": "https://cdn.example.com/signature.png" } }The response is either bytes or a link: { "renderId": "r_789", "status": "done", "url": "https://cdn.example.com/renders/cert_123/r_789.pdf" }That split matters for integration. Bytes are better when a backend wants to store the file itself. A URL is better when the caller only needs a sharable asset or a preview target.Batch jobs and no-code CSV flows solve different problems Batch jobs are for volume. The client posts a list of rows, gets back a job ID, then polls status or waits for a completion callback. That fits event badges, voucher runs, and bulk certificate work where the data already lives in a spreadsheet or database export. A no-code CSV flow is simpler for operations teams. They upload a CSV, map columns to template variables, preview a few records, fix broken fields, then export the final images or PDFs. The hard part is not the upload, it's catching invalid rows before the whole campaign ships.Pattern Input Output Best forSingle render One template ID plus one data object Image bytes or hosted URL OG image, one-off certificate, previewBatch job One template plus many rows ZIP, job ID, callback result Bulk certificates, tickets, campaignsCSV upload in app Spreadsheet columns mapped to variables Preview and export Ops teams, marketers, event organizersA server-side template system like Zandovi can also support both paths, because it reads templates and renders them, and it supports batch generation through CSV or API rows. That makes the workflow usable for both engineers and non-coders without changing the underlying rendering model.Performance, Accessibility and SEO ConsiderationsFormat choice changes cost more than teams expect PNG works well when the image needs crisp text and transparency. JPEG is the obvious fit for photo-heavy backgrounds. WebP often fits web delivery better when size matters, and PDF belongs in print workflows where output fidelity matters more than browser preview speed. Dimensions matter too. A card built at the exact target size avoids an extra resize step later, which keeps text and logos cleaner. Dynamic image systems also benefit from caching headers and clear CDN edge keys, because preview bots and repeat visitors should not force a fresh render every time.Accessibility and SEO need their own payloads Social cards, certificates, and tickets should carry informative alt text when they're embedded as images, or an adjacent accessible data payload when the image is only one part of the experience. Structured data belongs where it applies, because the rendered image alone doesn't tell assistive tech what the asset means. For SEO, dynamic OG images affect link previews first and ranking signals only indirectly. Cached previews can go stale, so cache control and stale-while-revalidate behavior matter when the page title or hero changes. If the image sits on the critical path for page rendering, it can also hurt LCP, so the visual asset should stay off the main page render path unless there's a strong reason otherwise.The safest pattern is boring: serve the right format, at the right size, with a stable URL, then let caches do their job.The Zandovi Open Graph template page is an example of how teams usually separate share-card output from the main page render flow. That separation keeps previews reliable without making every page pay for image generation.Best Practices Before You ShipTreat rendering like production infrastructure Every render request should carry an idempotency key. If retries happen, the system should return the same result instead of creating duplicate vouchers, duplicate OG files, or duplicate certificate jobs. Long-running jobs should use callbacks instead of endless polling, because polling creates noisy traffic and makes failure handling messy. Retention deserves a policy before launch. Certificates and vouchers often contain personal data, so generated assets shouldn't live forever by accident. If an asset can be regenerated, the storage window should be explicit and deletion should be part of the workflow, not an afterthought.Handle the failures on purpose Three failure modes show up often. A render timeout should fall back to a cached default. Missing upstream data should substitute a placeholder variable instead of throwing a half-rendered file. An asset 422 should retry with backoff before the system gives up, because malformed payloads and transient fetch issues don't deserve the same response. Template governance matters too. A small set of owners should control versioning and approvals, especially when marketing can ship changes at odd hours. Log every render with template ID, variable hash, and duration so drift can be diagnosed later without guessing.Practice Failure mode it preventsIdempotency keys Duplicate renders after retriesWebhook callbacks Endless polling and missed job completionRetention policy Unbounded exposure of personal dataDefault fallback asset User-visible timeout failuresPlaceholder substitution Broken output from missing dataBackoff on 422 Repeated failure loops on bad assetsTemplate ownership and versioning Unreviewed layout changesRender logging Impossible debugging after template driftThe right operating model is simple enough to explain at a glance and strict enough to survive a busy launch day. If the team can't say who owns a template, how retries behave, and when outputs expire, the pipeline isn't ready.Choosing the Right Approach for Your Team A hosted template API makes sense when the team is small, the design team already works in a browser editor, and the goal is to ship OG images, social cards, or certificates quickly without owning Chromium or a render farm. It also fits teams that want a clean template contract and don't want to debug browser font issues at midnight. A headless-browser renderer fits when the brand needs near-perfect parity with an existing web design system, the company already runs Node or Python services, and the team can absorb queueing, font caching, and sandbox work. It's a heavier path, but sometimes that's the right trade when pixel fidelity is the constraint. If a static image is enough, skip the whole pipeline. That's the cheapest answer when the content rarely changes or the benefit of personalization is too small to justify the complexity. When comparing vendors, check the boring things first. Ask whether the API returns a hosted URL with cache headers, whether QR codes and verification dates are supported for tickets and certificates, what the retention window is, whether assets can be deleted on request, whether non-developers can safely update templates, and whether pricing is per render or per template. A 30-minute proof of concept usually beats a week of comparison shopping. If the next project is a dynamic OG image, a bulk certificate export, or a voucher system that needs reliable rendering, the right move is to build one template and test one real data row today. Start with a narrow use case, verify the delivery shape, then expand only after the render path survives retries, bad data, and a preview bot hitting it twice.
- 28 Aug, 2026
Image Generation API: The 2026 Developer Reference
The popular advice around an image generation API is usually wrong because it assumes there's only one kind. Text-to-image APIs turn prompts into new pictures, while template rendering APIs take an approved design and fill in data so the output stays pixel-identical across calls. This guide is about the second category, because that's the one backend teams need when the asset has to stay on-brand, repeatable, and safe for production. That distinction matters immediately for OG cards, certificates, badges, vouchers, and personalized email graphics. If a team needs novelty, a prompt model makes sense. If a team needs the same layout to render reliably from structured data, a template renderer is the right tool.Table of ContentsTwo Meanings of Image Generation API What a Template Rendering API Does The contract should stay explicitHow Template-Rendering Vendors Differ by Workflow Where each vendor tends to winSingle Render Request and Payload Handle failures like an API, not like a UIBatch Renders and Spreadsheet Workflows Batch systems should be explicit about failuresOperational Questions Buyers Should Ask Why Deterministic Templates Beat Prompts for Brand Assets Template Rendering vs HTML-to-Image Performance, Throughput, and Delivery Integration With Automation Tools Quick Reference Cheat Sheet Next Steps and Related ReadingTwo Meanings of Image Generation API Most confusion starts because vendors use the same phrase for two different systems. In one camp, an AI model takes a prompt and returns a probabilistic raster, which is useful for ideation and one-off visuals. In the other camp, a template renderer accepts structured data and returns the same design every time, which is what branded automation needs. The split is practical, not semantic. A prompt model can improvise typography, composition, and imagery, but that same flexibility becomes a liability when a logo must stay aligned or a certificate name must not drift. A template renderer removes that risk by locking the visual system first and changing only the data.Practical rule: If a designer owns the layout and a developer only swaps fields like a name, date, or code, the job belongs to a template renderer.That's why the rest of this reference stays on the deterministic side of the category. The overlap in marketing language is the problem, and the fix is to stop treating all image APIs as if they were interchangeable.What a Template Rendering API Does A template rendering API exists for repetitive, brand-controlled assets. The common use cases are OG images, certificates, badges, vouchers, and personalized email graphics, where the layout stays fixed and only the data changes. The output can be a raster image or a PDF, depending on the workflow.The request shape should be boring. A client sends POST /api/v1/templates/{id}/generate with an X-Api-Key header, then passes variables as JSON so the service can bind each field into the template. The response comes back as PNG, JPEG, WebP, or PDF, which covers most web, email, and print pipelines.The contract should stay explicit The best implementation treats the template like a versioned product spec, not a loose design file. The payload should separate product-owned fields from provider-mapped fields, because reproducibility depends on the exact request context, not just the finished asset. Cloudinary's guidance on image-generation APIs also recommends storing the prompt, source image, model settings, output metadata, and request IDs so the rendering history can be audited later, and that logic applies just as strongly to deterministic renderers that run inside automated pipelines. Cloudinary's guidance on prompt versioning, metadata, and auditability A clean rendering contract should also answer a few questions before the first request leaves the service:What fields are required? The API should reject missing variables before render time. What formats are valid? Teams need a fixed list, not guesses. How is delivery handled? Bytes are fine for direct embedding, hosted URLs are better for downstream sharing. What happens under review? High-stakes assets should go through human approval before publishing.The important part is determinism. Same template, same data, same pixels. That's the whole point.How Template-Rendering Vendors Differ by Workflow The category splits by workflow, not by marketing copy. Some tools are built for batch certificates and spreadsheet-driven jobs. Others are better for editor ergonomics or broader output support. Zandovi sits in the deterministic template-rendering group with a REST API, a browser editor, and batch rendering for OG images, certificates, and vouchers. Bannerbear, APITemplate.io, Placid, Templated, and Abyssale cover adjacent slices of the same problem.Vendor Pricing Model Free Tier Output Formats Batch Endpoint Delivery ModeZandovi Plan-based render quota Yes PNG, JPEG, WebP, PDF Yes Bytes or hosted URLBannerbear Credit-based, “1 image = 1 credit” Pricing page states monthly quota mechanics Image outputs, including PDF support in some workflows API-supported batch workflows Hosted URL and API delivery modelAPITemplate.io Tiered subscription Pricing page should be checked live Image and document outputs Batch-oriented workflows are documented API delivery model with hosted assetsPlacid Subscription-based Check live page for current availability Marketing graphics and document outputs Batch support varies by plan Hosted deliveryTemplated Template editor plus API access Check live page for current availability Image, video, PDF Workflow-based rendering API render workflowAbyssale Subscription-based Check live page for current availability Marketing image outputs Workflow support varies Hosted deliveryBannerbear's pricing page states “1 image = 1 credit”, and says the API monthly quota equals the number of new images that can be generated in a month. That makes volume the clearest buying signal for render-heavy teams. Bannerbear pricing Templated's workflow is straightforward. Create the template in the editor, get an API key, and call the render API for image, video, or PDF outputs. Templated workflow APITemplate.io follows the same basic pattern, a render-via-API workflow that takes a template and a JSON payload. APITemplate render API For a tighter vendor-by-vendor breakdown, use the dedicated comparison at Zandovi vs APITemplate.io. That is the right place to compare workflow details without flattening the category into a generic feature checklist.Where each vendor tends to winZandovi: Better fit for batch certificates, vouchers, and other spreadsheet-shaped jobs because the plan structure is tied to render volume and batch rows. Bannerbear: Easier to evaluate when the team wants a simple credit mechanic and a broad existing ecosystem. APITemplate.io: Strong when editor ergonomics and render-via-API simplicity matter more than deep workflow tuning. Placid: Often shows up in marketing-graphics use cases where integration fit matters more than raw rendering mechanics. Templated: Useful when the workflow needs image, video, and PDF outputs from a design-first editor. Abyssale: Worth checking for marketing-asset automation needs, but the buying question stays the same, render model, delivery mode, and batch fit.Buyers should compare pricing model, delivery mode, and batch behavior before they compare surface-level UI polish.Single Render Request and Payload A single render call is the workhorse endpoint. The request should be a plain HTTP POST to a versioned render route with a template ID, a data object, and an output selector, because that shape is easy to retry, log, and validate. The client should send an authentication header, plus an idempotency key so a network retry doesn't create a duplicate render. A practical payload looks like this: curl -X POST "https://api.example.com/v1/render" \ -H "Authorization: Bearer YOUR_API_KEY" \ -H "Content-Type: application/json" \ -H "X-Idempotency-Key: 550e8400-e29b-41d4-a716-446655440000" \ -d '{ "template_id": "tpl_12345", "data": { "recipient_name": "Amina Khan", "course_title": "Backend Systems", "date": "2026-08-28" }, "format": "pdf", "width": 1200, "height": 630, "delivery": "url" }'A successful URL-mode response should return a JSON envelope with a signed location, not raw pixels: { "status": "success", "delivery": "url", "url": "https://cdn.example.com/renders/abc123.pdf" }Handle failures like an API, not like a UI The difference between sync and async matters here. Sync mode is for quick, user-facing renders where the caller can wait for a result. Async mode is better when the asset is heavy or when downstream systems don't need the file immediately. Validation should fail fast with field paths, quota issues should return a rate or credit error, and retries should be deliberate, not automatic noise.The right response shape is the one that downstream systems can consume without guessing whether they got bytes, metadata, or a temporary URL.The operational rule is straightforward. Use bytes when the image goes straight into another payload, use a hosted URL when the asset needs to live beyond the request, and keep idempotency on for every retryable request.Batch Renders and Spreadsheet Workflows Batch rendering is where template APIs stop being a nice-to-have and become infrastructure. When the source of truth is a CSV, a form export, or a CRM list, the right shape is a batch endpoint that accepts a shared template ID and a rows array with per-record overrides. That is the only sane way to generate certificates, badges, vouchers, or event assets at scale.The spreadsheet-to-render pattern is especially useful for non-developers. A marketing ops lead can upload names and values, the service can validate each row, and the batch job can return a ZIP or a set of hosted files once the rows finish processing. The right public-facing workflow is described in Zandovi's YouTube thumbnail template workflow, which is the kind of reusable template path teams need when a campaign ships in volume.Batch systems should be explicit about failures The batch contract should not pretend every row is equal. Some rows will fail validation, some will render cleanly, and some will need manual review before the job can be released. A good API keeps the row-level result visible so the caller can decide whether to rerun the bad records or discard them. Operationally, the batch job should include these controls:Row identity: Each record should have a stable identifier so retries don't duplicate work. Result visibility: Success and failure should be reported per row, not only at the job level. Completion signaling: Polling works, but a signed callback is cleaner for automation. Billing clarity: Failed renders should not be treated the same as completed ones.That design keeps batch jobs predictable. It also avoids the common spreadsheet problem where a single malformed cell blocks every other record in the file.Operational Questions Buyers Should Ask The buying decision always comes down to the same checklist. Teams want to know the per-render cost, whether a free tier exists, which formats are native, how delivery works, and whether batch throughput matches their volume. Those are contract questions with a technical wrapper.Question Vendor A Vendor B Vendor CPricing model Zandovi uses plan-based render quotas, with Free $0, Personal $29, Studio $49, Team $79, and Business $199 Bannerbear states “1 image = 1 credit” on its pricing page Bannerbear pricing Templated exposes API access through a render workflow tied to its editor and plan structure TemplatedFree tier Yes, a permanent free plan exists Check the current pricing page for live availability Check the current pricing page for live availabilityOutput formats PNG, JPEG, WebP, PDF Zandovi capabilities Image and PDF workflows are documented on the pricing page Image, video, and PDF are part of the product workflowDelivery mode Bytes or hosted URL Zandovi capabilities Hosted URL and API delivery model API render workflow with hosted output deliveryBatch throughput Plan-gated batch rows per job are published on the product page Batch handling exists, but buyers should verify current limits before purchase Workflow-based, but throughput should be rechecked liveUse the vendor page as a snapshot, not a promise. Procurement should recheck the live page before signing anything, because quota math and delivery behavior are the details that usually change first. The operational questions that look boring often decide the purchase:Data retention: How long generated assets stay available. Regional handling: Whether storage and processing meet residency requirements. Compliance docs: Whether the vendor can produce the paperwork a security review expects. Custom assets: Whether uploaded fonts, logos, and source files count toward storage or quota.The right filter is simple. If a vendor cannot answer these questions plainly, it is not ready for a production render workflow. With those questions on file, you can judge whether deterministic rendering fits your brand-asset needs.Why Deterministic Templates Beat Prompts for Brand Assets Brand assets need repetition, not surprise. Deterministic template rendering wins for OG images, certificates, badges, vouchers, and personalized email graphics because the same inputs always produce the same pixels. That consistency is the requirement, not a side benefit. Text-to-image models make sense for mood boards, hero art, and other cases where novelty matters more than repeatability. They're the wrong choice when typography, spacing, and logos have to stay locked. A template renderer keeps the master design under human control and only exposes the safe variables, such as {{recipient_name}}, {{course_title}}, and {{date}}.If the team would be upset by a different font weight, shifted logo, or changed layout, it should not be a prompt-based workflow.The decision rule is simple. If the asset must look the same tomorrow as it does today, bind it to a template. If uniqueness is the goal, let a model generate it.Asset Type Recommended Approach ReasonOG image Template rendering Needs repeatable branding and fixed dimensionsCertificate Template rendering Names, dates, and seals must stay alignedBadge Template rendering Layout has to be stable across many recordsVoucher Template rendering Codes and values need deterministic placementEmail hero graphic Template rendering Brand consistency matters more than noveltyMood image Prompt model Creative variance is usefulBlog illustration Prompt model Unique art direction can help engagementFor a practical example of the template side, Zandovi's Open Graph template workflow shows the exact kind of locked-layout asset that belongs in this category.Template Rendering vs HTML-to-Image HTML-to-image tools solve a different problem. They rasterize arbitrary HTML and CSS, which is useful when a team already has a page or component that needs to become an image. The tradeoff is operational weight, because browser-based rendering means font installs, layout drift, and more moving parts. Template renderers are tighter. They accept a constrained JSON payload, validate fields before render time, and keep the design locked inside a template contract. That makes them easier to reason about when the same asset is generated repeatedly from structured data.Dimension Template Rendering API HTML-to-ImageInput shape Structured fields against a known template Arbitrary HTML and CSSDeterminism High, same inputs produce the same output Lower, browser quirks can shift pixelsOperational burden Lower, no browser fleet Higher, browser runtime needs careBest use case Certificates, badges, vouchers, OG images Bespoke pages, complex DOM layoutsPick HTML-to-image when the layout already exists as web code and the team needs pixel capture from that code. Pick template rendering when the asset is repeated, branded, and parameterized. That's the difference that matters.Performance, Throughput, and Delivery Renderer architecture drives latency more than the template itself. Lightweight template engines are a better fit for low-latency image work because they don't need to boot a browser process for every render. Browser-based stacks carry more overhead and make throughput planning messier. Batch jobs should run in worker pools with stable retry rules. A team should send a stable render_id or idempotency token for each logical asset, store the returned URL against that key, and retry only on transient errors. That keeps retries from becoming duplicate renders. Hosted delivery is usually the cleaner path for scale. The API can return a stable URL that downstream systems cache, proxy, or pass to another service without decoding binary blobs. Bytes mode still matters for one-off email embeds and direct file handoffs.Operational rule: Bytes are for immediate consumption, URLs are for everything that outlives the request.Integration With Automation Tools n8n, Make, and Zapier all handle this the same way when there's no first-party node. The workflow uses an HTTP Request or Webhooks module, sends POST to the render endpoint, and includes the API key in the authorization header. The payload stays in JSON, because that's the easiest format for template variables. For single renders, the node should be configured to accept a binary response if the downstream step needs raw pixels. For batch jobs, the automation should send the row array, wait for the completion callback, and then iterate the returned URLs into storage, email, or messaging actions. Error handling should branch immediately on 4xx validation errors, then retry 429 and 5xx responses with backoff.Field n8n HTTP Request node Zapier Webhooks action Make HTTP moduleMethod POST POST POSTURL Render endpoint Render endpoint Render endpointHeaders Authorization, Content-Type, Idempotency-Key Authorization, Content-Type, Idempotency-Key Authorization, Content-Type, Idempotency-KeyBody JSON template ID and variables JSON template ID and variables JSON template ID and variablesResponse handling Binary for bytes, JSON for URL mode JSON or file handling JSON or file handlingThe important part is credential hygiene. The API key belongs in the platform vault, not inside node fields that get copied around by accident.Quick Reference Cheat Sheet Use the single-render endpoint for one asset and the batch endpoint for rows. Keep the headers consistent, keep the payload explicit, and decide delivery mode before implementation starts.Single render endpoint: POST /api/v1/templates/{id}/generate Batch endpoint: POST /api/v1/render/batch Headers: Authorization, Content-Type: application/json, Idempotency-Key Payload keys: template_id, format, width, height, variables Delivery modes: bytes for inline consumption, url for hosted delivery Common status codes: 200, 400, 402, 429, 500That's the shape worth pinning in a team wiki. If the vendor can't support it cleanly, the integration will become custom glue fast.Next Steps and Related Reading A clean shortlist starts with one live test render, then one batch test against real spreadsheet rows. For deeper buying work, compare the bulk workflow guide at bulk image generation API and the pricing breakdown at image generation API pricing 2026, then pin this reference in the engineering wiki before procurement starts.

- 28 Aug, 2026
Certificate Maker Software: 2026 Buyer's Guide
You're choosing certificate maker software because the spreadsheet is already waiting, the cohort is already done, and the cleanup window is already shrinking. If the tool can't validate data before render, can't produce a print-ready PDF, and can't give each certificate a verifiable ID, it's not a certificate workflow. It's a future support ticket. Table of ContentsWhat to Look for Before You Pick a Tool Audit the workflow before the design Score the tool against failure, not beautyHow Certificate Maker Software Renders at Scale Stable design, variable data Why server-side rendering mattersThe Five Fields a Certificate Template Binds Keep the spreadsheet small Treat the ID as the credentialValidation That Runs Before Anything Renders What good validation actually looks like Why pre-billing checks matterA Realistic 230-Row Batch From Spreadsheet to ZIP What good validation looks like Why the example scales cleanlyTurning a Certificate Into a Checkable Credential QR codes are not decoration Fraud prevention starts in workflow designDecision Checklist and First-Batch Path Use a scorecard that matches the work Start with a safe first batchWhat to Look for Before You Pick a Tool Start with the contract, not the canvas. The key question is whether the software can take a spreadsheet, map fields cleanly, render a print-ready PDF at 300 DPI, and leave you with certificates a third party can verify later. The market is already big enough to show this isn't a novelty, with digital certificate management software estimated at USD 907.3 million in 2025 and projected to reach USD 2.1 billion by 2035 in one industry estimate, while a broader certificate management tool market is put at USD 3.221 billion in 2024 and USD 5.502 billion by 2034 in another, with North America at 40% and Asia Pacific at 30% industry estimate. That scale tells course teams, HR leads, and event operators the same thing, buyers want systems that can issue at volume without breaking layout or governance.Audit the workflow before the design A serious evaluator should ask four blunt questions. First, does it run a bulk batch from a spreadsheet without manual intervention. Second, does it expose templates through an API or at least a clean import path. Third, can a non-designer maintain the template without rebuilding it from scratch every quarter. Fourth, can each certificate carry a unique ID that a verifier can check later.Practical rule: treat the spreadsheet as the contract. If the software can't tell you which columns are required, which are optional, and which blanks fail loudly, the first batch will be your test run whether you want one or not.That matters because certificate issuance is now a high-volume software problem, not a hand-editing task. Internet certificate workflows reached massive scale long ago, with public SSL/TLS certificate issuance reported at 10,940,896,117 certificates in Q1 2026, roughly 1,407 certificates per second, and CT logs at 13.75 billion certificates in Q2 2026, up 33% from 10.33 billion in Q2 2025 transparency-log analysis. Branded certificates are a different use case, but the operating lesson is the same, automation wins only when the data contract is strict.Score the tool against failure, not beauty The fastest way to choose badly is to judge template polish before validation and verification. A decent tool separates stable layout from variable data, catches malformed rows before rendering, and produces files that print cleanly without a browser in the middle of the pipeline. If the vendor can't show how it handles spreadsheet rows, row-level errors, and verification IDs, the design editor is decorative noise. For course creators and HR teams, that usually means one more test, the batch has to survive a boring roster. If the roster comes from an LMS export, a payroll file, or a session spreadsheet, the tool should absorb it with the same rules every time. Anything less turns one clean Friday upload into a Monday cleanup job. See Zandovi pricingHow Certificate Maker Software Renders at Scale The right architecture is simple to describe and easy to get wrong. The design lives in one layer, typography, borders, seals, and background art, while the recipient data lives in another layer, names, dates, course titles, and certificate IDs. That separation is why batch issuance works at all, the template stays fixed and the rows change bulk certificate generator workflow.Stable design, variable data A workable engine compiles the template once, then walks the data row by row. Each row binds to named fields, renders a PDF, writes the file, and moves on, which is why one template can produce five certificates or five thousand without redrawing the layout. That is also why file-by-file manual editing falls apart once the roster grows, every certificate becomes a separate error surface. The better systems don't just merge text. They validate variable length, detect malformed rows, and guard against visual breakage before the renderer starts. Long names, odd character sets, and mismatched columns are not edge cases, they're normal batch inputs.Why server-side rendering matters At scale, batch systems should use queues and workers, not a synchronous loop that blocks the user interface. The operating pattern is clear, the user uploads or posts the roster, jobs enter a queue, workers render PDFs, upload outputs, notify recipients, and mark completion when done technical guidance on batch rendering. That's the difference between a tool that feels instant for one certificate and a tool that survives a cohort.If a vendor says batch is “just like single export, but repeated,” assume it hasn't been stressed properly.Server-side rendering also keeps output consistent. A deterministic renderer gives the same pixels every time, which matters for certificates, where the layout is part of the credential, not a suggestion. If the system depends on browser rendering, font drift and environment drift sneak in, then someone notices after the PDFs have already gone out.The Five Fields a Certificate Template Binds The cleanest certificate workflows keep the template simple and the spreadsheet tighter. The starter template binds exactly five fields, recipient_name, course_name, completion_date, signer_name, and certificate_id. In most real batches, only recipient_name and certificate_id vary per row, which is the whole point of separating cohort defaults from per-person data.Field Typical binding Default across cohort? Validation riskrecipient_name Per recipient No Spelling, accents, long valuescourse_name Per cohort Yes Wrong title, inconsistent namingcompletion_date Per cohort Yes Date format mismatchsigner_name Per cohort Yes Signature line driftcertificate_id Per recipient No Duplicate or missing IDKeep the spreadsheet small The best practice is not to stuff every repeated value into the CSV. A two-column roster is harder to break than a five-column roster, and every column removed is one fewer place to misspell something. If the course title, date, and signatory are fixed for the whole cohort, the template should hold them as defaults and the sheet should only carry the true variables. That design choice also limits validation noise. You're left checking the fields that change, instead of cleaning up a hundred rows of identical data. The result is a roster that reads like a contract, not a database export.Treat the ID as the credential The certificate ID deserves more attention than the course title. It's the field that makes the document queryable later, and it's the field that should stay unique per recipient. The printed name can be human-readable, but the ID should be the machine-traceable anchor that a verifier can look up. A signature graphic belongs in the design layer, while the printed signer name is just another text variable. That distinction matters, because teams often confuse the visual mark of authority with the actual validation mechanism. The signature makes the certificate look complete, the ID makes it checkable.Validation That Runs Before Anything Renders A reliable system stops bad input before it wastes time. The pipeline should read each row, compare it against the template schema, and show a row-level error report before a single PDF is produced. In the stronger implementations, variables can be marked required, given allowed-values lists, and constrained with length or pattern rules, so the software catches bad data where it starts instead of after export.What good validation actually looks like A decent upload screen doesn't just say failed. It should tell the operator something like “3 errors in 230 rows”, name the row and column, and send the correction back to the spreadsheet instead of forcing a UI hunt. That's the difference between a five-minute fix and a lost afternoon. The better systems also validate long names before render so the operator learns that one value is far outside the normal range before it prints too small to read. The input contract should be explicit enough that a non-technical operator can work without guessing. If a course title must match one of three allowed values, that rule belongs in the template. If a certificate ID must follow a pattern, that belongs there too.Why pre-billing checks matter Billing should happen after the data clears, not before. If the batch is rejected at validation, it shouldn't be billed, and if a render fails, that failure should be refunded. That policy keeps cleanup from becoming a financial penalty, which is exactly where cheap tools get expensive.Catching three bad rows costs minutes. Catching them after 230 certificates have been rendered, printed, and mailed costs far more than time.Template validation and operations meet here. The operator needs a clear pass or fail state, the job queue needs failure isolation, and the corrected rows should be the only ones that need reruns. Anything else makes batch work feel fragile even when the PDF output looks polished.A Realistic 230-Row Batch From Spreadsheet to ZIP A finished cohort hits the practical test the minute the roster leaves the LMS or HR export and lands in the certificate tool. A decent upload screen should report the bad rows by number, name the field that failed, and send the correction back to the spreadsheet. In this batch, a course ends on Friday with 230 attendees, the lead uploads the file, validation catches three bad rows, the sheet gets fixed, and the final job returns as a ZIP with one print-ready PDF per learner. The process can run from the browser, from an API request, or through the template browser at Zandovi certificate templates, but the logic stays the same.What good validation looks like The validator should show exactly what is wrong before anything renders. In a batch like this, the failures are usually plain, a blank name, a duplicate identifier, or a value outside the allowed list. Plain is good, because plain errors are easy to fix in the spreadsheet without touching the layout.Stage Input Result ActionUpload 230-row spreadsheet Validation starts Read headers and variablesCheck Row 47, row 112, row 198 3 errors found Fix source dataRe-upload Corrected spreadsheet All rows pass Queue batch renderRender 230 valid rows One PDF per learner Build ZIP archiveDeliver ZIP and manifest Complete batch Store or share outputsThe important part is timing. The bad rows should be rejected before billing, before render, and before anyone starts cleaning up a mess that should have been blocked at upload.Why the example scales cleanly The point of the batch is repeatability, not just speed. Each output file should be named from the data so the ZIP matches the roster line for line, and the manifest should carry the certificate IDs and verification URLs. That gives ops teams an audit trail when a learner asks for a reissue months later. For the Team plan, 230 rows can stay in one job, while lower tiers force the same roster into smaller chunks. That is a planning issue, not a design flaw, and it is why the spreadsheet should be structured before the first upload. If the roster is messy, the render queue will be messy too.Turning a Certificate Into a Checkable Credential A decorative PDF stops being enough the moment someone else has to trust it. The strongest certificate maker software turns the file into a checkable credential with a unique ID, a public verification path, and a QR code bound to that ID. That combination gives employers, regulators, and recipients a way to authenticate the document without emailing the issuer for confirmation verification and fraud concerns.QR codes are not decoration A QR code only matters if it resolves to a certificate ID that can be checked later. If it just points to a generic webpage, the code is branding, not verification. The better pattern is simple, generate a unique serial, store the record at render time, expose a public lookup page, and encode the URL into the certificate so the scan resolves to the right credential. The credential should also carry the usual checklist items, recipient name, achievement description, issue date, issuer signature, and a serial or QR token PDF certificate creation checklist. Those fields make the artifact legible to humans and verifiable to machines.Fraud prevention starts in workflow design Fake certificates are easy to make with graphic software. That's why verification can't be an afterthought, or the design becomes a fraud-friendly PDF with a nice logo. The stronger vendors treat verification as part of the core product, not a secondary settings page.A certificate without a verification path is a polished attachment, not a credential.Operationally, the best test is blunt. If the certificate can be forwarded, printed, scanned, and checked later without contacting support, the workflow is doing its job. If it can't, the design work was wasted on something decorative.Decision Checklist and First-Batch Path A buyer should shortlist tools by asking one question per failure mode. Can the software separate template data from row data. Can it export a print-ready PDF. Can a non-designer maintain the template. Can each certificate carry a unique verifiable ID. If the answer to any of those is vague, the tool is too soft for real issuance. Compare certificate workflows in Zandovi vs BannerbearUse a scorecard that matches the work The scorecard should reward data-binding fidelity, error-reporting depth, output resolution, and verification-page persistence. That keeps the review focused on the certificate operation itself instead of flashy editor features that won't matter after the first cohort. If the vendor can't show row-level validation or a stable lookup page, it doesn't belong on the shortlist. For teams choosing between a free tier and a paid tier, the right trigger is batch size and governance, not aesthetics. The free plan should be fine for small runs, but once the roster needs more rows, custom IDs, or team access, the paid tier becomes the operational default. Zandovi's published plans are Free $0, Personal $29, Studio $49, Team $79, and Business $199, with batch caps and render limits rising across tiers, while the manual editor exports stay unlimited on paid plans and print-ready PDF stays available on every plan.Start with a safe first batch A clean first run should follow a simple path. Export the cohort to CSV, open one bundled template, map the fields, run a small dry render, fix the obvious data issues, and only then launch the full batch. That keeps the first live issuance inside one sitting rather than turning it into a design project. A practical sequence looks like this:Export the roster carefully. Use the source spreadsheet as the truth and keep repeated values out of the CSV when the template can default them. Run a small test batch. A 10-row dry render is enough to catch kerning, long names, and date formatting mistakes. Fix the obvious issues. Misspellings, duplicates, and malformed IDs should be cleaned in the sheet, not inside the certificate editor. Commit the full batch. Turn on verification links, confirm the manifest, and archive the ZIP with the roster. Save the template. The next batch should be upload, validate, submit, not redesign.The best first batch is boring in the right way. It proves the spreadsheet is the contract, the PDF is the artifact, and the verification link is the thing that keeps the certificate useful after the email gets buried.If the current tool can't validate rows before render, can't give each certificate a verifiable ID, and can't survive a cohort without manual cleanup, it's costing time that doesn't show up on the invoice. Pick the workflow that makes the spreadsheet the source of truth, run a dry batch, and switch the next cohort to a system that can issue, verify, and archive without a rescue session.

- 27 Aug, 2026
HTML to Image: A Developer's Guide
A Tuesday afternoon render job starts behaving like a production incident. A Puppeteer worker that normally handles a steady stream of invoices begins timing out. Container memory climbs, Chromium processes restart, generated images differ by a few pixels, and the local reproduction looks perfectly healthy. The team adds RAM, increases retries, and discovers that every workaround creates another failure mode. That situation usually means the team has treated HTML to image as a simple export operation. It isn't. The actual job is turning declared markup or a controlled design into a pixel-accurate, deterministic image at a latency and operating cost the product can tolerate. Four architectural families solve that job differently: browser screenshots, legacy WebKit wrappers, native rendering libraries, and template-driven rendering APIs. The useful comparison isn't a feature checklist. It's render fidelity, fleet cost, and design ownership. The final question matters more than many engineering teams expect: when a marketer changes a color, does an engineer edit code, or does a designer update a template? Table of ContentsThe Slow Screenshot Problem Most Developers Hit First When a working pipeline becomes an operational problem The actual decisionWhat HTML to Image Actually Means Similar jobs that need different toolsThe Four Main Implementation Approaches Puppeteer and headless Chromium wkhtmltoimage and WebKit wrappers Native Skia-based renderers Template-based image and PDF APIsPerformance, Memory, and Determinism by the Numbers Render path comparisonSide by Side Code Snippets for the Two Paths Browser capture with Puppeteer Template rendering with a JSON requestWhy Template Driven Rendering Wins for Steady Workloads Where the model earns its placeChoosing the Right Path for Your Workload Decision matrix A migration sequence that limits riskThe Slow Screenshot Problem Most Developers Hit FirstWhen a working pipeline becomes an operational problem A Puppeteer pipeline often starts sensibly. A Node handler launches Chromium, loads a page, waits for a selector, captures a screenshot, and returns a PNG. A few jobs run quickly enough, so the architecture feels settled. The trouble appears when concurrency rises or the page becomes more complicated. Browser startup, HTML parsing, CSS calculation, font loading, image retrieval, JavaScript execution, painting, and file encoding all become part of the critical path. A capture can fail because an image has not arrived, a web font is still loading, an element isn't visible in headless mode, or Chromium is under memory pressure. Practical Puppeteer guidance recommends waiting for specific selectors, all images, and fonts, including document.fonts.ready, because a screenshot taken before those resources settle can be incomplete. The Puppeteer screenshot reliability guidance makes the operational point clearly: “take a screenshot” is not a sufficient readiness policy.Production rule: A screenshot is only deterministic when the inputs, rendering environment, and readiness conditions are controlled.The inconsistency becomes expensive because failures rarely arrive in a clean pattern. One container produces a slightly different font edge. Another misses a remote asset. A large viewport triggers slow capture behavior or tile-memory warnings in Chromium, as documented in a Puppeteer issue about large screenshots. The team then owns browser versions, fonts, asset access, process limits, pooling, retries, and crash recovery.The actual decision The requirement isn't merely “convert HTML.” It's closer to this:Resolve a layout. Load every required asset. Paint the result consistently. Encode it into a portable output. Repeat the process predictably under load.That requirement leads to four approaches rather than one universal tool. Browser rendering prioritizes arbitrary HTML and CSS fidelity. Native renderers prioritize speed and repeatability. Legacy wrappers prioritize simple deployment for older layouts. Template services prioritize controlled designs, variables, batching, and reduced infrastructure ownership. A screenshot API is the right tool when the requirement is arbitrary HTML and CSS. Zandovi doesn't render HTML. It renders a designed template server-side with Skia, which is a different approach to the same job. The comparison should therefore stay focused on three axes:Render fidelity: How closely does the output match a browser, and how much layout complexity can it handle? Fleet cost: How much CPU, memory, process management, and recovery logic does every render require? Design ownership: Who maintains the visual system when spacing, colors, copy, or imagery changes?Those axes reveal whether a browser fleet is necessary or whether a controlled rendering model fits the workload better.What HTML to Image Actually Means HTML to image means taking markup, resolving its layout, and emitting a raster file such as PNG, JPEG, or WebP, or drawing onto another visual surface that preserves the intended composition. The renderer has to interpret elements, styles, dimensions, images, fonts, and positioning before it can produce pixels. This is not text-to-image AI. No model samples pixels from a prompt, and no diffusion process reconstructs a visual scene. The correct mental model is simpler: deterministic rendering of declared markup against a chosen layout engine. That distinction matters because the input contract changes completely. A browser screenshot accepts arbitrary page structure and behavior. A template renderer accepts a defined composition and variable data. An image generation API in this context should mean a programmatic rendering endpoint, not a generative model.Similar jobs that need different tools HTML-to-image capture can sit beside several related workflows without being identical to them:PDF generation: A PDF may preserve text, vectors, and pagination rather than flattening everything into an image. Some systems also create a PDF from a rendered visual, but that's a separate output decision. Interactive application screenshots: Capturing a dashboard or web app includes runtime state, JavaScript behavior, authentication, and asynchronous content. It's broader than rendering a static design. Full-page server-side rendering: Rendering HTML for SEO produces a document that users and crawlers can consume. It doesn't necessarily produce a bitmap artifact. Template rendering: A controlled design replaces page structure with a stable visual contract and injects data into approved fields.For a recurring visual asset, the Open Graph image templates pattern is closer to template rendering than to arbitrary webpage capture. The design remains fixed while titles, images, branding, and metadata change. Every implementation must resolve the same environmental variables, even when the code looks different:CSS engine and supported layout features Font availability and font loading completion Viewport dimensions Device pixel ratio Image and external asset readiness Network access and failure policy Color handling and output format Waiting behavior, including whether the job waits for network idleA browser makes many of those choices implicitly. A native or template renderer makes fewer of them, but the team must understand the supported design model before migrating. Pixel accuracy comes from controlling the rendering contract, not from adding retries after the fact.The Four Main Implementation ApproachesPuppeteer and headless Chromium Puppeteer with headless Chromium provides the broadest browser fidelity. It can render arbitrary HTML, modern CSS, web fonts, JavaScript-driven layouts, responsive breakpoints, and pages that depend on browser APIs. If the source already exists as a web page, screenshot capture usually requires the least conceptual transformation. That flexibility carries infrastructure responsibility. Each concurrent job shares or consumes browser resources, and the team must manage pooling, process isolation, browser updates, navigation timeouts, asset access, font readiness, and crash recovery. Chrome's behavior also changes as the browser version changes, so pixel parity requires version control and regression images. This is the right path for arbitrary user HTML, scraped pages, interactive applications, and designs that change frequently. It's also the path teams should choose when browser behavior itself is part of the requirement.wkhtmltoimage and WebKit wrappers wkhtmltoimage can be inexpensive to deploy for older reporting systems and straightforward invoice layouts. It fits environments that already rely on the WebKit rendering model and don't need modern browser behavior. Its limitation is technological drift. The project is unmaintained, and modern CSS support can lag behind current browser expectations. A layout that looks correct in a current Chromium browser may require concessions or special handling in wkhtmltoimage. It remains a pragmatic holding pattern for legacy reports, especially when migration risk is higher than the immediate cost of staying put. It shouldn't be selected for a new system that depends on contemporary CSS.Native Skia-based renderers Skia-based renderers compile rendering work into native libraries rather than starting a complete browser process for every capture. ResVG and SkiaSharp represent this family, although each tool has its own supported surface and layout model. The advantages are attractive for static compositions: lower process overhead, controlled execution, and repeatable output when the supported primitives are known. The tradeoff is manual asset bridging and reduced support for rich browser layout. Teams may need to translate HTML-like content into drawing operations or constrain templates to features the renderer handles well. This family suits an engineering team that wants to own a renderer for a narrow, specialized visual system. It can be fast and deterministic, but that determinism comes from narrowing the problem, not from reproducing the entire browser.Template-based image and PDF APIs A template-based image and PDF API stores a curated design and accepts structured variables at render time. The caller sends data such as text, image references, QR values, or barcodes rather than shipping an arbitrary document tree. The model moves responsibility away from browser operations and toward template governance. A vendor handles rendering infrastructure, asset hosting, batching, and output delivery, while the engineering integration focuses on the template contract and request lifecycle. Zandovi belongs to this family. It uses a visual editor and server-side Skia renderer, reads templates through its API, and renders images or print-ready PDFs from JSON variables. It doesn't create, update, or delete templates through the public API. The migration shape is straightforward: markup becomes a designed template, and dynamic values become placeholders such as {{name}}. This approach fits steady assets such as certificates, receipts, social cards, report covers, vouchers, and badges. It doesn't replace a screenshot API for arbitrary HTML and CSS.Performance, Memory, and Determinism by the Numbers The 2026 benchmark data shows why pooled browsers feel much better than cold browsers while still carrying meaningful operational cost. On a 1200×630 template, Puppeteer took 2,800 ms for the first render and reached 1,200 ms p50 on subsequent cold renders. A pooled browser reduced subsequent p50 latency to 380 ms. The same test measured a dedicated API at 340 ms on first render, 180 ms p50 on subsequent renders, and 420 ms at p99. These figures come from the 2026 HTML-to-image benchmark). The memory profile is just as important as latency. A cold Puppeteer render used about 180 MB, while pooled mode used about 45 MB. The API path kept client-side memory at 0 in that benchmark. That doesn't mean an API has no server-side resource cost. It means the application doesn't carry the browser process and its memory lifecycle inside the rendering client.Render path comparisonApproach Cold latency Warm latency p99 tail Memory/worker DeterminismPuppeteer, cold browser 2,800 ms first render 1,200 ms p50 on subsequent cold renders Not reported in the benchmark About 180 MB Sensitive to browser, fonts, assets, and timingPuppeteer, pooled browser Browser pool avoids repeated startup 380 ms p50 Not reported in the benchmark About 45 MB Better with controls, still environment-dependentDedicated rendering API 340 ms first render 180 ms p50 420 ms p99 0 client-side memory Defined by the service's rendering contractDOM-to-image library 3.1 ms on a small simple element Not reported Not reported Not reported Depends on DOM and CSS supportThe independent SnapDOM Chromium Vitest benchmarks add an important qualification. html-to-image took 3.1 ms for a small simple element, 429.0 ms for a complex 1200×800 page view, and 984.2 ms for a large complex scroll capture. html2canvas took 67.7 ms, 178.0 ms, and 735.2 ms for the corresponding cases. The benchmark is available in the DOM capture performance research. Those results don't identify a universal winner. They show that DOM size, CSS complexity, capture area, browser state, and pooling strategy dominate the outcome. A small card and a large scrolling document are different rendering problems.Side by Side Code Snippets for the Two Paths A migration becomes easier to evaluate when the implementation shape is visible. The Puppeteer path owns browser readiness. The template path owns a template identifier and a variable contract.Browser capture with Puppeteer async function renderWithPuppeteer(browser, html) { const page = await browser.newPage(); try { await page.setViewport({ width: 1200, height: 630, deviceScaleFactor: 1 }); await page.setContent(html, { waitUntil: "networkidle0" }); await page.evaluate(async () => { await document.fonts.ready; await Promise.all( [...document.images].map((image) => { if (image.complete) return Promise.resolve(); return new Promise((resolve) => { image.addEventListener("load", resolve, { once: true }); image.addEventListener("error", resolve, { once: true }); }); }) ); }); return await page.screenshot({ type: "png", fullPage: false }); } finally { await page.close(); } }The snippet looks compact because the browser pool sits outside the handler. Production code still has to handle pool exhaustion, navigation limits, retries, browser crashes, asset authorization, font preloading, output size, and differences between headed and headless execution. A fixed viewport helps, but it doesn't remove the need to control every visual input.Template rendering with a JSON request async function renderWithTemplate(apiKey, templateId, variables) { const response = await fetch( ` { method: "POST", headers: { "X-Api-Key": apiKey, "Content-Type": "application/json" }, body: JSON.stringify({ variables }) } ); if (!response.ok) { throw new Error(`Render failed: ${response.status}`); } return Buffer.from(await response.arrayBuffer()); }The second path doesn't accept arbitrary markup. The template is designed and versioned separately, while the request carries values. In a Zandovi integration, the API reads an existing template and renders it. It doesn't manage template creation or updates through the public API. The engineering tradeoff is visible in the code. Puppeteer requires operational controls around a browser fleet. Template rendering requires a stable template contract and careful version management. When a designer changes the layout, the integration should continue sending valid JSON. When the data schema changes, engineers should update the payload without rewriting visual markup.Migration rule: Replace markup ownership with template ownership, then replace DOM selectors with named variables.That doesn't make template rendering a drop-in replacement for every browser capture. It makes the boundary explicit.Why Template Driven Rendering Wins for Steady Workloads A controlled template is usually the better architecture for a visual asset that changes rarely and renders repeatedly. Certificates, receipts, Open Graph cards, report covers, vouchers, and event badges don't need a browser to behave like an interactive website. They need the same design to accept different data and produce the same pixels. The ownership model is the main advantage. A non-engineer can maintain the design in a visual editor, while engineers send JSON variables. That removes pull requests for routine visual changes and avoids turning every color adjustment into a renderer deployment.Where the model earns its place Template-driven rendering wins when the workload has these characteristics:Stable composition: The same visual structure serves many records. Structured variables: The changing content can be represented as text, images, QR codes, barcodes, or other defined fields. Pixel sensitivity: Small differences in fonts, spacing, or device-pixel ratio create unacceptable output drift. Batch demand: The team needs certificates, badges, vouchers, or marketing assets from rows of data rather than isolated screenshots. Separated ownership: Designers should adjust layouts without requiring engineers to maintain HTML and browser behavior.A browser fleet also carries costs that don't appear in the request handler. Teams manage cold starts, pooled processes, font availability, image readiness, crash recovery, and Chromium upgrades. Browser startup and HTML parsing can be substantially slower than a canvas-based approach that skips those steps, as described in the comparison of headless Chrome and canvas drawing. The recommendation remains workload-shaped. Puppeteer is the right choice for arbitrary HTML, scraped pages, interactive states, and designs that change frequently. A template renderer is the stronger fit for a defined catalog of repeatable visual assets. Zandovi's template library uses a visual design editor, variable placeholders, server-side Skia rendering, and outputs that include PNG, JPEG, WebP, and print-ready PDF. The key architectural shift is simple. Engineers stop maintaining a browser-rendered document and start maintaining the data contract. Designers own the template. The renderer owns the pixel output.Choosing the Right Path for Your Workload The fastest way to choose is to classify the workload before comparing vendors or rewriting code. The important questions are practical:Does the input contain arbitrary HTML and CSS, or a known set of fields? Do most jobs reuse a stable design? Can a small visual difference pass review? Who should approve a color or spacing change? Does the team want to operate browsers, or only call an endpoint? Are failed rows isolated and retried independently?Decision matrixWorkload Volume Best fit Why OwnerArbitrary user HTML or interactive pages Variable Puppeteer and headless Chromium Browser fidelity and JavaScript support matter more than operational simplicity EngineeringLegacy reports and simple invoices Stable wkhtmltoimage during migration Existing layouts may work, and migration can wait until CSS requirements change EngineeringSocial cards, certificates, vouchers, badges, and receipts Repeating Template-driven renderer such as Zandovi Controlled designs benefit from deterministic rendering, structured variables, and batching Design for visuals, engineering for JSONSpecialized static compositions Defined Skia-based renderer Native control suits teams willing to own supported primitives and asset handling Rendering engineeringVolume alone shouldn't decide the architecture. A low-volume but high-risk screenshot can still need Chromium, while a busy certificate workflow can remain manageable with a template API if rows are validated and failures are isolated. The repeat rate, visual drift tolerance, and ownership model usually matter more than raw request count.A migration sequence that limits riskInstrument the existing path. Record cold and pooled latency, memory behavior, failure reasons, asset readiness failures, and output dimensions. Group the workload. Separate arbitrary pages from repeatable visual assets. Don't migrate both under one abstraction. Choose the riskiest repeatable template. Pick a design with difficult fonts, images, QR codes, or long text so the pilot tests real constraints. Map markup to variables. Convert dynamic HTML into a template with {{variables}}. Keep the data contract explicit and validate values before rendering. Compare image outputs. Use representative data, fixed dimensions, and a review process for typography, wrapping, assets, and color. Run a controlled pilot. Send a portion of the repeatable workload through the new path while retaining the existing renderer for fallback. Move ownership deliberately. Give designers access to the visual template workflow and keep engineers responsible for payload validation, retries, and observability.For teams evaluating an HTML-to-image alternative to Bannerbear, the same discipline applies. Compare the actual workload, not a demo card. Verify how templates are maintained, what the API reads and renders, how batch jobs behave, which output formats are supported, and how failures are handled. Puppeteer isn't a mistake. It's the correct tool when a browser is the product requirement. It becomes the wrong tool when a stable graphic is being treated like a page, forcing engineers to operate an entire browser environment for a design that could have been a controlled template.Developers with a slow or inconsistent Puppeteer pipeline should start by measuring the current renderer, then separate arbitrary HTML from repeatable assets. For the repeatable group, build one difficult pilot template, map its markup to {{variables}}, and compare outputs before changing production traffic. Teams that want to test a live template-rendering workflow can create a Zandovi account and validate the migration with a small, representative batch.

- 26 Aug, 2026
Bannerbear in 2026: The Honest Developer and Ops Guide
A product team can have a perfectly good template, a working API call, and a queue full of customer data, then discover that the problem is quota accounting. Image renders look inexpensive until PDFs consume multiple credits, batch volume spikes, or a monthly cap stops production without a small top-up option. That's the operational reality behind a Bannerbear evaluation in 2026. Bannerbear deserves a serious look because it's an established template-rendering API with a visual editor, REST interface, and native automation connectors. It also deserves scrutiny because rendering cost, PDF metering, and quota behavior matter more than a feature checklist once a workflow reaches production. Table of ContentsChoosing a Template Rendering API in 2026 What Bannerbear Is and Who Built It The product audienceEditor, API, and Rendering Under the Hood PDF behavior is a production constraintPricing, Quotas, and the PDF Multiplier Real-World Use Cases and Where Each Tool Fits Four workflow decisionsMigration Checklist and Sample API Calls A practical migration sequence Keep rollback boringWhen Bannerbear Is Still the Better Choice Making the Final CallChoosing a Template Rendering API in 2026 The first decision isn't which vendor has the most attractive landing page. It's whether the team understands the workload being purchased. A rendering API sits between structured data and finished visual assets. A content system sends names, prices, dates, images, or URLs. The service applies those values to a template and returns an image or document. This is template-based image generation, not AI image generation. The output follows a design created by the team, so consistency matters more than prompts or creative variation. A fair evaluation should use five operational lenses:Rendering model: Determine whether the service uses a browser, a graphics engine, or another server-side renderer. The choice affects font handling, HTML compatibility, determinism, and debugging. Quota math: Count what consumes a unit. An image, PDF page, animation, and multi-output request may not have the same cost. Format coverage: Confirm whether the workflow needs PNG, JPEG, WebP, PDF, GIF, or video. A format listed on a marketing page isn't enough. The team needs the billing rule and production constraints. Integration surface: Separate native Zapier or Make apps from a generic HTTP request. Both can work, but they impose different setup and maintenance demands. Day-two operations: Check how failed jobs, retries, callbacks, hard limits, hosted files, and bursts behave after launch.Practical rule: Model the busiest ordinary month and the largest predictable batch, not just the average daily request count.Primary vendor documentation should carry the most weight. Pricing pages, API references, help articles, and changelogs are more useful than undated comparison lists. For teams also evaluating another image rendering API, the API template comparison provides a separate reference point, but the same verification standard applies. The rest of the decision should distinguish verified product facts from editorial judgment. Where documentation doesn't establish a capability, it shouldn't be treated as present. That discipline prevents a familiar brand from winning by assumption.What Bannerbear Is and Who Built It Bannerbear was launched by Jon Yongfook as a bootstrapped product that grew out of earlier experiments and became a dedicated REST API for generating images. One company account traces early product work to 2018–2019, a rebrand to Bannerbear in 2020, and the API launch in March–April 2020. The company has also been described as founded in 2020 and externally funded at $0, according to Bannerbear's company profile and milestone record. That origin explains the product's shape. Bannerbear isn't a general-purpose design application that later added automation. It was built around reusable templates, dynamic fields, and programmatic output. A designer establishes the composition, while an application supplies the changing values. The growth path is notable because it reflects steady bootstrapped scaling rather than a single launch spike. Bannerbear crossed $1,000 ARR, reached about $10,455 MRR in late 2020 to early 2021, passed $40,000 MRR by June 2022, moved above $45,000 MRR by August 2022, and exceeded $50,000 MRR by July 2023. It was reported around $630,000 ARR in 2025, while later third-party estimates placed it near $991,400 ARR and 596 customers in 2024, as recorded in Bannerbear's published milestone article.The product audience Bannerbear suits teams that already think in templates and data mappings. Typical users include developers building dynamic social graphics, operations teams automating documents, and marketing teams connecting databases to visual assets. Its strongest audience usually has at least one of these characteristics:An existing automation stack: Native Zapier and Make connectors reduce the need to construct every workflow around raw HTTP calls. A recurring template workflow: The same visual structure is reused with changing text, images, or metadata. A need for an established platform: Mature documentation and a longer production history can matter more than the lowest unit cost.Bannerbear is therefore best understood as an incumbent template-rendering service. It's not primarily a manual design canvas, and it shouldn't be selected only because a template editor looks familiar. The key question is whether its API and quota model match the assets being produced.Editor, API, and Rendering Under the Hood Bannerbear's operating model starts with a visual, layered template. Static design elements remain fixed, while dynamic layers receive values through an API request. That approach is useful for social cards, campaign graphics, and other assets where a stable composition needs fresh data. The API documentation confirms a REST workflow built around image requests and template modifications. Teams can send structured changes to a template and retrieve a generated result. Bannerbear also supports automation through its Zapier integration, while its broader integration positioning includes Make. That surface is valuable, but it's important to separate documented facts from assumptions. The available verified documentation establishes Bannerbear as a template-based image and video automation product with API and no-code automation positioning. It doesn't establish every implementation detail in the requested editor, SDK, renderer, or callback comparison, so those details shouldn't be presented as confirmed facts without a directly supporting primary source.PDF behavior is a production constraint Bannerbear's PDF pipeline isn't a separate press-production renderer. An API request enables PDF output with the render_pdf: true flag. The documentation states that PDFs are generated at 96 dpi, and exposes two outputs:pdf_url, for a higher-quality and larger file. pdf_url_compressed, for a smaller file with minimal visual loss.The PDF rendering documentation makes the tradeoff clear. A team can reduce file size, but the 96 dpi ceiling remains relevant for certificates, invoices, badges, and other files that may be printed.Capability Bannerbear ZandoviTemplate workflow Visual template-based automation Visual template editor with API renderingAPI role Sends template data and render options Reads templates and renders themPDF output render_pdf: true, with documented PDF URLs Print-ready PDF on every planPDF metering PDF rendering uses a credit multiplier One render counts as one image or PDFNative automation Native Zapier and Make integrations HTTP request node integrationRendering detail PDF documentation specifies 96 dpi Server-side Skia rendererTemplate management through public API Not established here beyond rendering behavior Public API reads templates and renders them, it doesn't create, update, or delete templatesFor teams choosing between platforms, the meaningful comparison is not “visual editor versus no visual editor.” It's how much production logic the template can absorb, how the API represents dynamic fields, and how the renderer handles the final format. Bannerbear is a sensible fit where the template is stable and the surrounding workflow already matches its API model.Pricing, Quotas, and the PDF Multiplier Bannerbear's pricing is usage-based, and the unit isn't “one finished file.” As of June 2026, Bannerbear's public pricing reference lists an entry plan at $49 per month for 1,000 credits, with no permanent free tier and a 30-image trial. Those figures should be checked against the Bannerbear pricing page before purchase because the commercial model is the part most likely to affect a production forecast. The more important detail is PDF metering. Bannerbear's API documentation states that render_pdf costs 3x quota, and its credits documentation says PDFs consume 3 API credits per rendered page. Standard image renders are cheaper. That creates a material difference for certificates, invoices, and print workflows, even when the template itself is uncomplicated. The Bannerbear API documentation is the relevant technical reference.Plan or rule Bannerbear, as of June 2026 Zandovi, as of June 2026Entry plan $49 per month, 1,000 credits, vendor pricing $29 per month, 5,000 renders, vendor comparisonPermanent free access No permanent free tier, 30-image trial, vendor pricing $0, 100 renders per month, full API access and print-ready PDF, vendor comparisonImage accounting Standard image render uses the ordinary quota rule, API documentation 1 render per image, vendor comparisonPDF accounting 3 API credits per rendered page, credits documentation 1 render per PDF, vendor comparisonManual editor exports Verify the current plan terms before budgeting Unlimited on paid plans, vendor comparisonCap behavior Teams should verify current limit and overage terms on the pricing page Hard stop at quota, no overage and no rollover, vendor comparisonThe operational question is what happens when the quota is exhausted. Independent 2026 reviews flag that credits can run out quickly on high-volume plans, that there's no pay-as-you-go overage, and that reaching the cap forces an upgrade rather than a small top-up. The independent Bannerbear review is useful for identifying this budgeting concern, though teams should confirm commercial terms directly with Bannerbear. A practical forecast starts with output types. A workflow generating images, PDFs, and other formats shouldn't multiply the monthly file count by a single average without checking each format's credit rule. For certificates, a run that appears modest in file count can consume quota faster than an equivalent image-only workflow.Real-World Use Cases and Where Each Tool Fits Bannerbear makes the strongest case when a marketing or content workflow needs repeatable graphics and low-friction triggers. Open Graph images, social cards, thumbnails, and campaign variants all benefit from a template that exposes controlled text and image fields. A marketing operator can update source data in a connected system and trigger a render without asking engineering to build a new design pipeline. Native connectors matter in that context. Bannerbear has public Zapier and Make integration pages, and its integration listing positions those tools as supported connections. That makes it a better operational fit than a service that requires every non-code workflow to be built around an HTTP module. Certificates and badges create a different pressure. If the design is mostly fixed and the workload is document-heavy, PDF credit accounting becomes central. Bannerbear remains capable of the job, but teams need to forecast page-level consumption rather than treating each certificate as equivalent to one image.Four workflow decisionsOpen Graph and social images: Bannerbear is a strong candidate when marketing teams need reusable templates and native automation connectors. Developers should still validate URL delivery, retries, and quota usage before putting launches on autopilot. Certificates and event badges: Compare PDF accounting, print requirements, batch limits, and failure handling. A lower file count doesn't necessarily mean a lower rendering bill. Localized ad creatives: Bannerbear suits campaigns with repeated layouts and many changing fields. The team should keep conditional business logic in the application when the template itself can't express the full rule set cleanly. Spreadsheet-driven production: A CSV or batch workflow needs row validation, predictable accounting, and a clear response for failed records. The right choice depends less on the editor and more on how the service handles the batch boundary.A hybrid architecture can be rational when two product lines have different needs. One queue can route marketing graphics to Bannerbear while a separate document worker handles bulk PDFs elsewhere. The comparison with Placid's template automation approach can help teams test that decision against another category option.Migration Checklist and Sample API Calls A Bannerbear migration should begin with the template contract, not the HTTP client. Inventory every template's dynamic fields, image inputs, QR elements, fallback behavior, and conditional layout rules. Teams should also record which templates are currently in production and which downstream systems consume the returned files.A practical migration sequenceFreeze the contract. Export the current template identifiers, input names, output formats, callback expectations, and retry rules. This prevents a visual redesign from being mistaken for an API migration. Map authentication separately. Bannerbear uses a project API key with bearer authorization. Any replacement must be tested with its own authentication header and secret-handling path. Translate the payload. A Bannerbear request generally carries a template identifier and a modifications object. A different renderer may represent fields as a flatter data payload. The adapter should normalize application data before it reaches either vendor. Rebuild delivery handling. Preserve job IDs, status transitions, retry behavior, and idempotency at the queue layer. Don't assume two callback systems have identical signing or retry semantics. Replay a controlled batch. Compare visual output, missing assets, font behavior, response latency, error classes, and quota consumption. The test should include long text, absent images, special characters, and the largest expected canvas.Keep rollback boring The safest cutover routes a small share of traffic to the new renderer while the existing Bannerbear path remains available. Store the selected renderer with the job record, keep template versions explicit, and prevent retries from switching vendors. A rollback checklist should cover queued jobs, callback endpoints, stored output references, and any consumer that assumes a particular file format. The public API of an alternative renderer should be treated as a read-and-render interface unless its documentation explicitly supports template management. That distinction avoids an especially costly mistake, trying to create, update, or delete templates through an API that only reads templates and renders them.When Bannerbear Is Still the Better Choice Bannerbear is still the right call for teams that value incumbency over aggressive unit economics. Its product history reaches back to the earlier experiments that preceded the 2020 launch, and its current shape reflects years of use as a dedicated template automation service. That production track record can outweigh a lower price when an existing workflow already works. The strongest case is operational familiarity. A team with established Bannerbear templates, working callbacks, and native Zapier and Make automations doesn't need to re-architect because another service has a different quota model. Bannerbear is older, has a longer production track record, and offers native Zapier and Make integrations that Zandovi doesn't have as of June 2026. Those are practical advantages, not minor checklist items.Bannerbear fits particularly well when:The automation already runs through Zapier or Make: Native connectors reduce custom HTTP plumbing and make ownership easier for operations teams. Templates have been stable in production: A mature template library and established request shape reduce migration risk. Image output dominates: PDF multipliers matter less when the workload primarily produces ordinary raster images. The team values continuity: Existing monitoring, credentials, runbooks, and operator knowledge have real replacement costs.Bannerbear loses ground when PDF volume is central, when the team needs a permanent free tier, or when predictable render-per-dollar accounting matters more than connector convenience. The full Bannerbear comparison table is the right place to verify the dated commercial differences before switching.Making the Final Call The decision should follow workload signals, not brand familiarity. Stay on Bannerbear when the workflow is already stable, image output dominates, and Zapier or Make handles most triggers. The incumbent's longer production history and native connectors justify staying put when migration would introduce more operational risk than financial benefit. Teams should still monitor credit consumption, especially when PDFs enter the pipeline. Switch when the workload is document-heavy, a permanent free tier matters, or the team wants one render to represent one image or PDF rather than applying format multipliers. As of June 2026, Zandovi lists $29 for 5,000 renders, a permanent 100-render free tier, and print-ready PDF access across plans in its dated comparison with Bannerbear. Those facts make it worth evaluating for cost-sensitive batch workflows, but the API and integration model must fit the team. Run both when the organization has different workloads. Bannerbear can remain the marketing automation path, while another renderer handles bulk documents behind a queue with explicit routing and independent budget alerts.Signal Stay on Bannerbear Switch to Zandovi Run BothExisting production templates Stable and already monitored Migration cost is acceptable Keep critical templates on the incumbentAutomation surface Zapier or Make is central HTTP request integration is acceptable Route by workflow ownerOutput mix Mostly images PDFs are a major workload Separate marketing and document queuesCost model Existing credit budget is predictable One render per image or PDF is preferred Compare real consumption in parallelOperational priority Continuity and track record Lower entry cost and permanent free access Reduce cutover riskSenior engineer's decision: stay with Bannerbear when integration maturity and continuity win, switch when PDF-heavy quota math wins, and run both when the workloads are different enough to justify separate rendering paths.Teams evaluating a template rendering API should test one real template, one difficult data row, and one representative batch before committing budget. For a direct alternative review, compare the live plans and API constraints at Zandovi's Bannerbear comparison, then run the same payloads through both systems and choose the path that produces predictable output without surprising the operations team.

- 24 Aug, 2026
Document Automation Tools: A Practical Guide for Teams
AI-native generation isn't automatically the best answer for document automation. A model can produce fluent language while still creating an output that is difficult to reproduce, explain, approve, or correct. For invoices, certificates, contracts, badges, and other business documents, reliability often matters more than semantic flexibility. The market's direction supports the importance of the category. The global document automation software market was estimated at USD 7.86 billion in 2024 and is projected to reach USD 28.04 billion by 2033, a 15.18% CAGR, according to document automation market estimates and trend analysis. Adoption is expanding across legal, finance, HR, marketing, and operations, but production success depends less on choosing the most advanced model and more on controlling data, rendering, retries, permissions, and document history. Table of ContentsWhy Most Document Automation Advice Gets It Wrong The reliability gapHow Document Automation Tools Actually Work Start with the template Bind structured data Render and distributeReal-World Use Cases That Drive Adoption Invoices and contracts Certificates and event badges Retail and membership assetsDeterministic Templates Versus AI-Native Generation Decision matrix Why hybrid systems workIntegration Patterns for Production Reliability Make submissions safe to retry Treat callbacks as hostile input Choose polling or callbacks deliberatelyPerformance and Best Practices for Scale Optimize the rendering path Separate interactive and batch work Monitor more than latencyYour Action Plan for Implementing Document Automation Build the first production pathWhy Most Document Automation Advice Gets It Wrong Most comparisons begin with extraction accuracy, natural-language generation, or a list of AI features. Those capabilities matter when a system must interpret messy documents or draft flexible content. They don't answer the harder production questions: Will the same input create the same output? Can the team prove which template and data produced it? What happens when a callback arrives twice? A document pipeline fails in mundane ways. A webhook retry can trigger duplicate documents, duplicate emails, or duplicate charges. A rendering stack built around a headless browser can become fragile when fonts, browser versions, page breaks, or memory limits change. A marketing team can update a logo in one source file while an operations workflow continues using an older template. None of these failures requires a weak AI model.Practical rule: Treat generated documents as production artifacts, not disposable text.The historical development of OCR helps explain why this distinction matters. OCR existed in various forms from the 1950s, then became commercially viable for business use in the 1980s and 1990s as scanning and computing improved, according to the history of document automation. That progression converted paper-heavy processes into searchable, digital workflows. Modern intelligent document processing now extends beyond recognition, with the market estimated at USD 2.30 billion in 2024 and projected to reach USD 12.35 billion by 2030, at a 33.1% CAGR, according to the same source.The reliability gap AI-native tools are valuable for interpreting unstructured input, summarizing text, suggesting clauses, and extracting fields whose location or wording varies. But a generated PDF often needs stricter guarantees than a draft paragraph. A regulated form, branded certificate, or print-ready ticket needs fixed placement, approved fonts, predictable pagination, and an audit trail. A deterministic template system makes a different promise. Given a known template, schema, and payload, it renders a controlled result. That doesn't eliminate review or testing, but it makes failures easier to reproduce. Teams can inspect the input, identify the template version, compare the output, and rerun the job without guessing what an invisible model decided. The strongest architecture often separates the jobs. AI can interpret incoming material and propose structured data. A deterministic renderer can then create the final asset. This division preserves flexibility at the boundary while keeping the business-critical output governed, repeatable, and testable.How Document Automation Tools Actually Work A modern document automation workflow resembles mail merge on steroids. Instead of placing a name into a word-processing file, a team designs a reusable visual template, exposes its variable fields, sends structured data through an API, and receives a finished image or PDF.Start with the template A designer creates the layout first. The template can contain fixed elements such as logos, colors, typography, backgrounds, legal text, and spacing. Variable fields then mark the parts that change, including names, dates, prices, product images, QR codes, barcodes, and membership identifiers. This separation gives non-designers a safer operating boundary. An operations user can update a recipient name or price without moving the logo or changing the approved type scale. Engineering teams also gain a stable rendering target instead of assembling layout rules inside application code.Bind structured data The application sends data that matches the template's variables. A JSON payload works well for an individual render, while a CSV file suits a batch containing many recipients or records. Conditional fields can control whether an element appears, but the underlying contract should remain explicit. A missing value should produce a clear validation error or an intentional fallback, not a malformed document that reaches a customer. Schema introspection is especially useful here. If a tool exposes the variables required by a template before data is submitted, an integration can validate field names and types before starting a render. That catches mismatches such as customer_name versus customerName during development rather than after a batch has already failed.Render and distribute The rendering service combines the template and payload into a final output. Server-side rendering keeps the layout engine in a controlled environment, while client-side rendering makes the browser, device, installed fonts, and runtime part of the production system. For automated business documents, that client dependency can create unnecessary variation. The output may be streamed directly, placed at a hosted URL with explicit expiry, or delivered through a completion callback. Distribution can then happen through email, print, storage, an e-signature workflow, or another internal system. The important design choice is to preserve the job identity and source data alongside the output, so later operators can understand what happened.Real-World Use Cases That Drive Adoption The strongest use cases have three characteristics: the layout is known, the data changes repeatedly, and manual assembly creates a bottleneck. That combination appears in finance, events, retail, membership operations, and marketing.Invoices and contracts A finance team may receive billing data from an accounting system and need to produce a consistent invoice for each customer. A template fixes the header, payment instructions, tax labels, and brand treatment, while the payload supplies the customer details, line items, totals, and due date. The resulting PDF can move into email delivery or storage without requiring a designer to open each file. The same model works for standardized contracts and agreements. Legal or operations teams maintain approved wording in a controlled template, then bind customer, product, term, and signature information from a CRM or intake form. The template shouldn't replace legal review where judgment is required, but it can remove repetitive copying and reduce the chance that an employee starts from an obsolete file. Teams evaluating invoice workflows can review invoice templates as a practical starting point.Certificates and event badges Event organizers often collect attendee data in a spreadsheet, then need badges or certificates that look identical while carrying unique names, roles, organizations, or QR codes. A CSV-driven batch job is a natural fit. The operator uploads or submits the rows, the renderer creates one output per record, and the resulting files can be packaged for printing or digital distribution. The value isn't only speed. Brand consistency remains intact when every output uses the same approved template. A late attendee-list change also becomes a data update rather than a redesign exercise. For certificates, a QR code can connect the printed artifact to a verification page without requiring the layout team to edit each file manually.Retail and membership assets Retail teams regularly change menus, prices, promotions, and localized graphics. A locked template can bind those values from a spreadsheet or commerce system while preserving the visual hierarchy. The same approach suits gyms, clubs, and membership organizations that need cards, renewal notices, welcome graphics, or personalized social assets. A marketing workflow might trigger a render from a CRM, automation platform, or form submission. The payload can include a member name, identifier, offer, image, and QR code. Because the final asset comes from a maintained template rather than a prompt, the team gets controlled branding across every variation.The best first workflow is repetitive, visually stable, and easy to verify.Deterministic Templates Versus AI-Native Generation The choice isn't really between “old templates” and “modern AI.” It's a choice about where variability belongs. Deterministic systems constrain the final layout and content structure. AI-native systems introduce flexibility where interpretation or composition is the main problem. A team should begin with the failure it can tolerate. If a draft needs human review and can vary in wording, AI may be appropriate. If a customer receives a document that must match an approved design and be reproducible later, deterministic generation is usually the safer foundation. A curated template library can also help teams test this distinction against real document types.Decision matrixUse Case Deterministic Templates AI-Native GenerationBrand-locked certificates and badges Strong fit. Fixed layout, typography, and data binding keep outputs consistent. Riskier. Visual and textual variation may require extra review.Compliance-sensitive PDFs Strong fit. Teams can version templates and reproduce a known result. Useful for assistance, but final output needs controls and approval.Invoices and recurring statements Strong fit. Structured data maps cleanly to stable fields and calculations. Less suitable when exact placement and repeatability matter.Summaries of unstructured documents Limited. Requires structured inputs or preprocessing. Strong fit. Models can interpret and condense varied material.Clause suggestions and draft language Useful for final assembly after review. Strong fit for proposing language or identifying relevant sections.Print-ready marketing assets Strong fit. Resolution, dimensions, and brand rules remain controlled. Riskier when visual consistency is mandatory.Ambiguous intake documents Often needs an extraction layer first. Strong fit for interpretation, subject to confidence checks.Why hybrid systems work AI is often better at understanding than at guaranteeing. It can extract a customer address from an inconsistent source, classify a request, or suggest a clause. The system can then normalize that result into a schema and pass it to a deterministic renderer. Any uncertain field can be routed for verification before document generation. This architecture also clarifies audit responsibility. The AI step records what it inferred and how a human corrected it. The rendering step records which template version consumed the approved structured data. That separation is easier to test than a single model that both interprets input and invents the final layout. Research on the category points toward the same governance concern. A document automation industry analysis describes workflow, verification, and structured output as important differentiators, while reporting that 54% of organizations cite data security as the top barrier and 49% cite data quality. The same source says 82.8% plan to invest within 12 months and 76.6% store 25% to 75% of their data in documents. Those figures suggest buyers aren't merely shopping for a better model. They're trying to make document-heavy operations secure, inspectable, and dependable.Integration Patterns for Production Reliability A demo usually proves that a document can be generated. Production proves that the system behaves correctly when requests time out, callbacks repeat, workers restart, data arrives late, and users click twice.Make submissions safe to retry Every render request should have a durable business identifier and an idempotency key. The receiving service stores the key with the resulting job or output. If the same request arrives again, the service returns the existing result instead of starting another job. This matters most for batch processing. A network failure can leave the caller uncertain about whether the provider accepted the request. Retrying without idempotency can create duplicate documents and duplicate downstream actions. The database or queue, not the client's memory, should decide whether work already exists.Treat callbacks as hostile input Completion events should be authenticated and processed as duplicate-prone. Webhook retry guidance for e-signature workflows recommends validating an HMAC signature against the raw payload, using a timing-safe comparison, applying replay protection with timestamps, and enforcing idempotency at the database or queue layer. The handler should verify the signature before parsing business fields. It should reject stale events according to the provider's policy, record the event identifier, and return a successful response only after safely storing the event or scheduling its work. A retryable downstream failure belongs in a queue, not in an unbounded request thread.A callback is a message, not proof that the next step has completed.Choose polling or callbacks deliberately Polling is simple and predictable for smaller integrations. The client submits a job, stores the job identifier, and checks status using controlled intervals. Callbacks reduce unnecessary requests for longer-running workloads, but they require signature verification, replay protection, delivery observability, and a recovery path when a callback is missed. Batch jobs should have explicit states such as accepted, processing, completed, partially failed, and failed. Each row should retain its own error information. A dead-letter queue prevents one malformed record from disappearing inside a large batch and gives operators a place to investigate or replay it. The following video provides a visual introduction to the operational patterns involved in reliable automated workflows. Hosted URLs and direct file streaming serve different needs. An expiring URL is convenient for asynchronous distribution and reduces payload handling, while direct streaming gives the caller immediate control over storage. Either way, access duration, revocation, and ownership should be explicit.Performance and Best Practices for Scale A document pipeline that works for a handful of renders can behave differently under concurrent load. Performance depends on the renderer, template complexity, image handling, queue design, cache behavior, and whether the execution environment must start before every job. A 2026 server-rendering benchmark measured first-page paint times of 936 milliseconds to 1.14 seconds across 22 documents for a native server renderer. Its WASM variant beat a competing WASM renderer on all 22 cold-start cases and 19 of 22 warm-start cases, showing that execution model and startup state can dominate perceived latency. These results are detailed in the PDF SDK performance benchmark.Optimize the rendering path Server-side rendering avoids making every client responsible for browser compatibility, font availability, and layout behavior. A managed native renderer can also simplify operations compared with maintaining a fleet of headless browsers and their dependencies. Template design affects latency. Large uncompressed images, unnecessary layers, complex transparency, and oversized fonts can increase rendering work. Teams should test representative templates, not only minimal examples. A visually simple badge and a photo-heavy promotional page may stress very different parts of the system.Separate interactive and batch work An interactive request needs a fast acknowledgement and clear status. A large batch belongs in a queue, where workers can process jobs with controlled concurrency. Parallel requests can improve throughput when the provider and downstream systems support them, but unbounded concurrency can create memory pressure, rate-limit failures, or storage contention. Caching is useful when the template and fixed assets remain unchanged. The system should cache reusable resources without caching personalized output under an ambiguous key. A safe cache key includes the template version and the relevant asset state, while personalized results remain tied to the job and payload.Monitor more than latency Operations teams should track render duration, queue wait time, validation failures, callback delivery, retry counts, output size, and provider errors. Transparent metering matters because a failed render shouldn't be treated as successful automation. Usage tracking also needs to distinguish organizations, workspaces, or API credentials so one workload doesn't hide another's behavior. Error handling should classify failures. Invalid data requires correction, a temporary provider error may be retried, and a malformed template needs an owner and a deployment process. Without these categories, teams tend to retry everything, which increases load while leaving the underlying defect unresolved.Your Action Plan for Implementing Document Automation A practical rollout starts with a narrow workflow, not an enterprise-wide replacement project. The first candidate should have structured inputs, a stable visual format, a clear owner, and an output that can be checked against a known example.Build the first production pathInventory recurring documents. Record which teams create them, where the data originates, who approves the result, and where the final file must go.Choose the rendering model. Use deterministic templates when layout, brand control, repeatability, or print quality matters. Add AI upstream when the source data is unstructured or requires interpretation.Define the schema before the template is finished. Name fields clearly, specify required values, decide how missing data behaves, and expose the contract for validation.Version the template and test real payloads. Include long names, missing images, unusual characters, large values, and page-boundary cases. Store the template version with each generated job.Make retries safe. Add idempotency keys to submissions, authenticate callbacks, record event identifiers, and route unresolved failures to a dead-letter queue.Measure operational quality. Review failed renders, duplicate prevention, queue delays, approval time, output consistency, and the effort required to update a template. Speed alone won't reveal governance failures.A visual editor helps design and operations teams own layouts without turning every change into an engineering task. Code-based integration remains important for authentication, data mapping, queue control, and monitoring. The strongest implementation gives each group a clear boundary instead of asking designers to maintain application logic or engineers to approximate brand layouts in code. Before committing, run representative documents through a trial workflow and review the provider's output formats, API behavior, workspace controls, usage visibility, and failure handling. Teams can compare available pricing options against expected volume and operational requirements, then begin with a low-risk batch before expanding into invoices, contracts, or customer-facing communications.Choose a repetitive document workflow, define its schema, and test it with real production edge cases this week. A controlled pilot will reveal more than an AI feature checklist, especially when the evaluation includes template versioning, idempotent retries, callback security, audit records, and predictable final output.
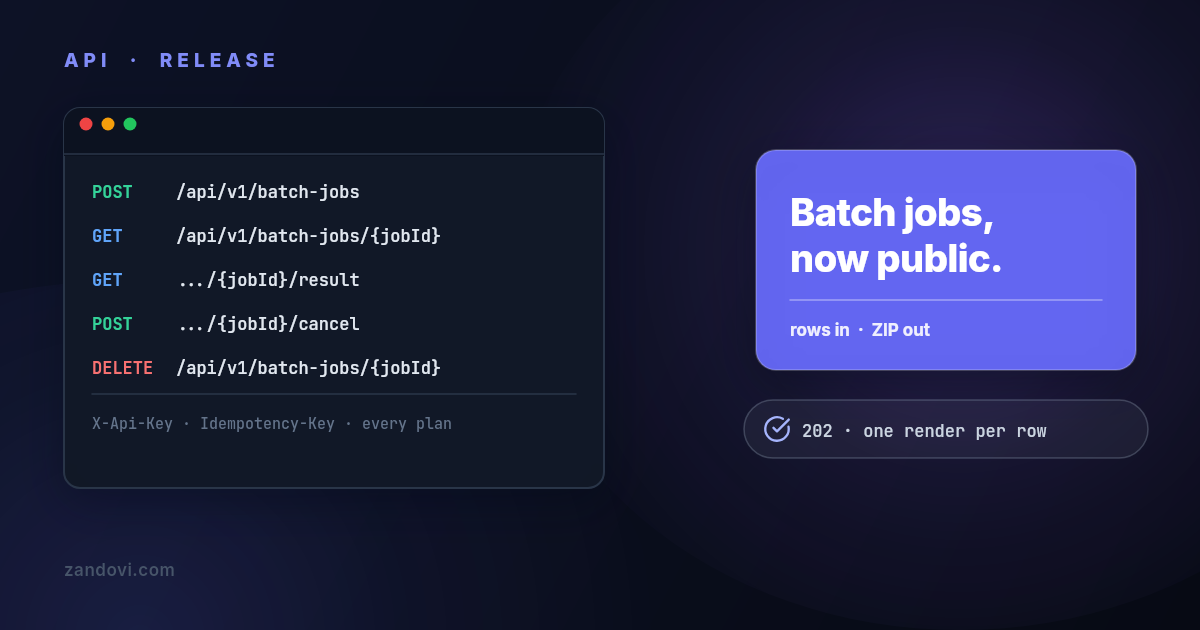
- 23 Aug, 2026
Batch Jobs Are Now in the Public API
Until this week, batch generation was an app feature. You could upload a CSV in the editor and download a ZIP, but from code the only way to render two hundred images was two hundred POST requests. Our own docs told you to loop the generate endpoint. Several of our own guides taught the workarounds: guard your retries, watch the rate limit, keep your own bookkeeping. That's over. Batch jobs are now a first-class resource in the public API, on every plan, with the same API key you already have: POST /api/v1/batch-jobs submit rows, get a job back GET /api/v1/batch-jobs list your jobs GET /api/v1/batch-jobs/{jobId} poll status and progress GET /api/v1/batch-jobs/{jobId}/items what each submitted row produced GET /api/v1/batch-jobs/{jobId}/result download URL or ZIP stream POST /api/v1/batch-jobs/{jobId}/cancel stop it, refund what didn't render DELETE /api/v1/batch-jobs/{jobId} remove a finished job and its archiveOne submission carries one template and up to 400 rows, each row becomes one image, and the job hands back a ZIP. The tutorial post walks the flow end to end with code; this note is about the decisions behind it, because a few of them are the reason to use it over the loop you already have. Retries can't double-bill you Bulk submissions are exactly the requests that get retried: they're big, they sit on the wire longer, and they run from job queues that re-execute on timeout. So the submit endpoint takes an Idempotency-Key header. Retry with the same key and you get the original job back instead of a duplicate, and your quota doesn't move. The implementation detail worth trusting: deduplication is a unique index in the database, not an application-level check. Two concurrent retries of the same submission race all the way to the insert, the database picks one winner, and the loser returns the winner's job and refunds itself. There is no window where both retries create a job. Reusing a key for a different submission fails loudly with a 409 instead of returning something that isn't what you sent. One key, one batch. Validation runs before billing Every row is validated against the template's variable rules at submission time. One bad row rejects the whole submission with a 400 that names it, no job is created, and no quota is charged. The failure mode where a job dies at row 217 and you reconstruct what rendered from your logs is not a failure mode this API has. Cancel refunds exactly what didn't render A job with N rows charges N renders up front, which keeps quota accounting simple and predictable. The other half of that promise is the cancel endpoint: stop an active job and every render that hadn't completed comes back, totalItems minus completedItems. The arithmetic runs on a conditional update inside the database, so a cancel that loses a race against the job's completion refunds nothing rather than refunding work you actually received. Cancelling a finished job is a harmless no-op. Deleting never refunds; cancelling is what settles the bill. The ZIP can't silently lose your files Filename patterns let you name output files from your data, "filenamePattern": "{voucher_code}", instead of image-000.png. Which raises a question nobody wants answered in production: what happens when two rows produce the same name? They get suffixed, ticket.png, ticket-2.png, case-insensitively, after the names are scrubbed of everything a filesystem might object to, including Windows-reserved names and path tricks. The invariant is blunt: a collision, an accented name, or a hostile value in a data column can rename a file but never drop one. The archive is flat — images only, no folder, no manifest — and a row that failed to render simply isn't in it. That's what /items is for: every submitted row in submission order, with the filename it produced, its size, and the error if it has one. Row-level bookkeeping reads without downloading anything, and it stays readable long after the archive itself has aged out. Job history survives key rotation Jobs belong to the account that created them, not to the API key. Rotate a key, and the replacement sees, polls, and downloads every job the old key created. Rotating credentials is something you should be able to do casually; losing your job history was a bad reason not to. Polling that isn't punished Submission is rate-limited to 1 per second. Status and result reads run at 100 per second, a separate tier, so a fleet of workers each polling their job every two seconds doesn't compete with, or get mistaken for, submission traffic. Poll freely; that's what the tier is for. Or don't poll at all A submission can carry a callbackUrl, and when the job reaches a terminal state we POST a summary to it — job id, terminal status, final counters — so an automation can submit and go quiet instead of holding a loop open for the length of the render. All three terminal states are delivered. Someone who stopped polling because a callback was promised has to hear about a failure and a cancellation too, not only a success. Two decisions in there are worth stating plainly. The payload carries no download URL: result links live an hour, and a delivery retried ninety minutes later would arrive holding a dead one, so you ask for a fresh link when your handler is ready to collect. And every delivery is signed — X-Zandovi-Signature, HMAC-SHA256 over the timestamp and the raw body, keyed by a per-organization secret that is deliberately not your API key. A leaked API key can't forge callbacks; a leaked signing secret can't render anything. Delivery is at-least-once with a deliveryId that's stable across retries, so deduplicate on it. Retries are bounded — five attempts over roughly fifteen minutes, which outlives a rolling deploy but refuses to become a permanent queue pointed at a dead URL. Because they're bounded, whether a delivery ever landed is readable on the job itself as completionCallback, with the attempt count and the last error. Without that, an endpoint that refused every attempt would look exactly like a job that never finished. There is no subscription API behind this, no event catalogue, and no endpoint registry to keep in sync. The URL belongs to the submission that wants to hear back. What's not in v1 One template per job; rows vary the data, not the design. Row caps are per plan, 25 on Free up to 400 on Business, and two jobs can be active at once. Result archives are kept for 30 days after a job finishes, after which the download reports itself expired rather than missing — the job, its counters and its per-row outcomes stay readable. If any of those are the thing between you and using it, tell us. If you're currently looping Keep the loop for event-driven single images; that shape is still right. For everything that renders a set, the migration is mechanical: the variables object you send per request becomes one entry in rows, the render options move up a level onto the job, and the response handling collapses into poll-then-download. # before: 400 requests, your retry logic, your rate limiting, your ZIP # after: curl -X POST https://app.zandovi.com/api/v1/batch-jobs \ -H "X-Api-Key: $ZANDOVI_API_KEY" \ -H "Content-Type: application/json" \ -H "Idempotency-Key: badge-run-2026-08-22" \ -d '{ "template": { "templateId": "'$TEMPLATE_ID'", "format": "png" }, "rows": '"$(cat rows.json)"' }'The CSV tab in the app isn't going anywhere; it's the same engine with a spreadsheet in front of it, and the when-to-use-which question has the same answer as before: humans upload files, backends POST rows.Full reference, including every error code and limit: Batch Rendering in the docs. The OpenAPI spec already includes the seven new operations if you'd rather import them into Postman. Callbacks have their own page: Completion Callbacks.
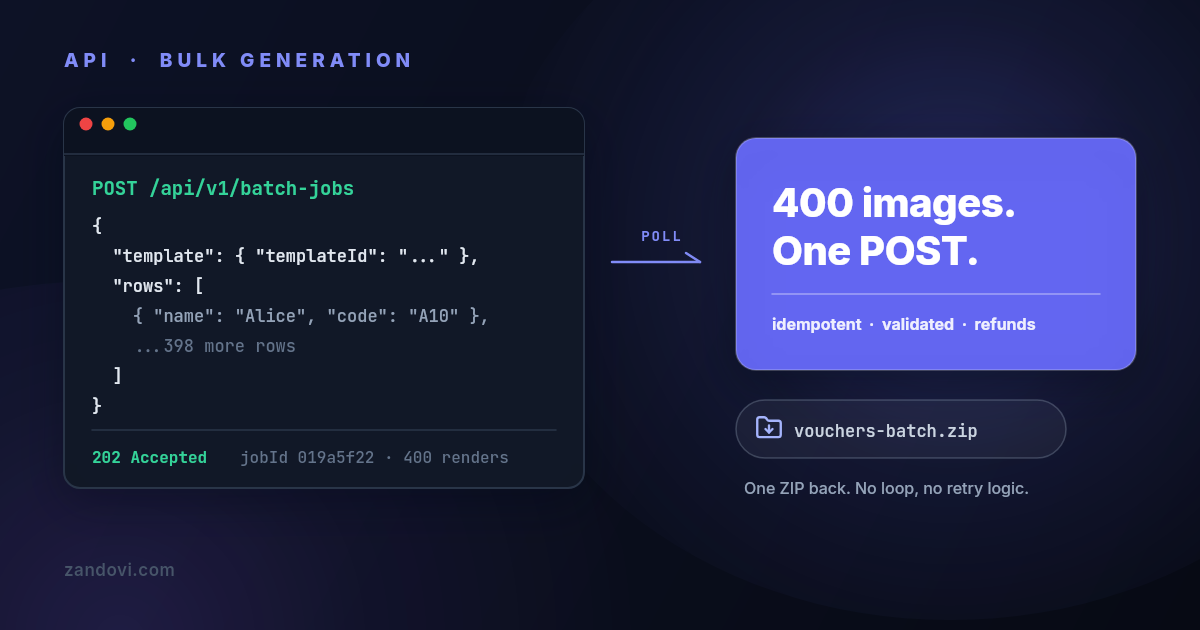
- 22 Aug, 2026
Bulk Image Generation Without the Loop: One POST, One ZIP
You have a template and a few hundred rows of data. A voucher per customer, a badge per attendee, that kind of job. The obvious move is a for loop around a render endpoint, and the obvious move works right up until it doesn't. The loop hits the per-second rate limit, so you add a sleep. Some requests time out, so you add retries. A retry lands on a request that actually succeeded, so now you've paid for the same image twice and you add your own deduplication layer. Request 217 of 400 fails on a bad row, so you write bookkeeping to know where to resume. Then you collect 400 responses into files, name them, and zip them yourself. None of that is image generation. All of it is your code now. Zandovi's batch endpoint exists so you don't write any of it. You POST the rows once, the service renders them all, and you download a single ZIP. This post walks through the whole flow and the details that make it safe to call from automation: idempotent retries, validation before billing, and refunds when you cancel. The shape of a batch job Three requests, start to finish:POST /api/v1/batch-jobs with a template ID and a rows array. You get 202 Accepted and a job ID back immediately. GET /api/v1/batch-jobs/{jobId} until the status turns COMPLETED. GET /api/v1/batch-jobs/{jobId}/result for a download URL, or the ZIP bytes directly.Each row is one rendered image, and each row costs one render from your monthly quota, the same as one call to the single-render endpoint. A 400-row job is 400 renders, charged when the job is accepted. Submitting the job Every row is an object mapping variable names to values, exactly the shape the single-render endpoint takes in variables. Format and render options are set once, on the job, because rows differ only in data: curl -X POST https://app.zandovi.com/api/v1/batch-jobs \ -H "X-Api-Key: $ZANDOVI_API_KEY" \ -H "Content-Type: application/json" \ -H "Idempotency-Key: spring-vouchers-2026" \ -d '{ "template": { "templateId": "019463b8-1234-7890-abcd-ef1234567890", "format": "png", "options": { "scale": 2 }, "output": { "filenamePattern": "{voucher_code}" } }, "rows": [ { "first_name": "Alice", "voucher_code": "ALICE10" }, { "first_name": "Bob", "voucher_code": "BOB20" } ] }'{ "jobId": "019a5f22-4c1e-7d90-b3a8-6f2e91c04d77", "status": "PENDING", "totalItems": 2, "createdAt": "2026-08-11T10:00:00Z" }The detail that does the most work here: validation runs before billing. Every row is checked against the template's variable rules at submission. If row 217 is missing a required value or carries barcode data that won't encode, the whole submission is rejected with a 400 naming the row, no job is created, and nothing is charged. You fix the row and resubmit. The half-finished batch, the one where you're not sure which rows rendered before it died, doesn't exist in this flow. Polling until it's done curl https://app.zandovi.com/api/v1/batch-jobs/$JOB_ID \ -H "X-Api-Key: $ZANDOVI_API_KEY"The status response carries totalItems, completedItems, failedItems, and an errors array with per-row messages, so a progress bar is free. Statuses run PENDING, PROCESSING, and then one of COMPLETED, FAILED, or CANCELLED. The inline errors array is capped at the first five failures — failedItems carries the true count, and GET /batch-jobs/{jobId}/items carries the whole list, one entry per submitted row with its filename, size and error. Status reads sit in a separate, much higher rate tier than submissions (100 per second versus 1 per second), so polling every couple of seconds is fine. In Node, the whole flow is about twenty lines: const BASE = "https://app.zandovi.com/api/v1"; const headers = { "X-Api-Key": process.env.ZANDOVI_API_KEY!, "Content-Type": "application/json", };async function renderBatch(templateId: string, rows: Record<string, string>[]) { const submit = await fetch(`${BASE}/batch-jobs`, { method: "POST", headers: { ...headers, "Idempotency-Key": `batch-${templateId}-${rows.length}` }, body: JSON.stringify({ template: { templateId, format: "png" }, rows }), }); const { jobId } = await submit.json(); while (true) { await new Promise((r) => setTimeout(r, 2000)); const job = await (await fetch(`${BASE}/batch-jobs/${jobId}`, { headers })).json(); if (job.status === "COMPLETED") break; if (job.status === "FAILED" || job.status === "CANCELLED") throw new Error(`Batch ${job.status}: ${JSON.stringify(job.errors)}`); } const result = await ( await fetch(`${BASE}/batch-jobs/${jobId}/result`, { headers }) ).json(); return result.downloadUrl; // valid for 1 hour; fetch again for a fresh one }One wrinkle worth knowing: calling the result endpoint before the job finishes returns 409 with code: BATCH_RESULT_NOT_READY, deliberately distinct from 404. Your code can tell "keep waiting" from "this job is gone" without guessing. Or let the job call you The loop above is fine for a script you're watching. For anything that runs unattended, hand the submission a callbackUrl and skip the waiting entirely: await fetch(`${BASE}/batch-jobs`, { method: "POST", headers: { ...headers, "Idempotency-Key": `batch-${templateId}-${rows.length}` }, body: JSON.stringify({ template: { templateId, format: "png" }, rows, callbackUrl: "https://example.com/hooks/zandovi", }), });When the job reaches COMPLETED, FAILED or CANCELLED, Zandovi POSTs a summary to that URL — deliveryId, jobId, status and the final counters. No download URL is in the body on purpose: result links expire after an hour and a retried delivery would arrive carrying a dead one, so your handler calls the result endpoint for a fresh link when it's actually ready to collect. Verify the delivery before you act on it. Each one carries X-Zandovi-Signature: t=<unix-seconds>,v1=<hex>, where the hex is HMAC-SHA256(secret, t + "." + rawBody). The secret is per organization, lives in the app under Settings → API Keys, and is not your API key. Three things break verification quietly: re-serializing the body before hashing it (read the raw bytes), comparing with === instead of a constant-time compare, and accepting stale timestamps. Delivery is at-least-once with five attempts over roughly fifteen minutes, so deduplicate on deliveryId and return 2xx as soon as you've durably accepted the payload — a handler that renders or emails inline will hit the ten-second timeout and be retried even though it worked. If a delivery gives up, the job says so: GET /batch-jobs/{jobId} carries a completionCallback object with the attempt count and the last error. Worth checking, because bounded retries mean an endpoint that refused every attempt otherwise looks identical to a job that never finished. The full rules are in Completion Callbacks. The retry that doesn't cost you twice The single-render endpoint has no server-side deduplication. Call it twice and you pay twice, which is why the automation platform guide spends three paragraphs on guarding your own retries. Batch submissions fix this properly. Send any string in the Idempotency-Key header, and a retry of the same submission with the same key returns the original job: the same jobId comes back, and nothing renders or bills twice. This holds even when two retries race each other, because the deduplication is enforced by a unique index in the database rather than by application code checking first and inserting second. Two rules keep it honest. One key belongs to one submission, so reusing a key with a different template, row count, format, or filename pattern is rejected with 409 BATCH_IDEMPOTENCY_KEY_REUSED instead of silently returning the wrong job. And the comparison is structural: the server matches the submission's shape, not every row byte, so don't recycle yesterday's key for today's data. Derive the key from the thing the batch represents, like payroll-aug-2026 or an order ID, and reuse it only when retrying that exact batch. If your code has any retry path at all, and it does, send the header. Files named from your data By default the ZIP contains image-000.png, image-001.png, and so on, which is fine until you need to match file 217 to a person. Set a filename pattern instead: "output": { "filenamePattern": "{voucher_code}" }Any row variable works as a placeholder, plus {index}, {timestamp}, and {random}. Values are lowercased and unsafe characters become hyphens. Skip the extension; the format's own extension is appended, so {voucher_code}.png would come out as alice10.png.png. If two rows produce the same filename, the later ones get a suffix, ticket.png then ticket-2.png. That rule sounds minor and isn't: it means an archive can never silently contain fewer files than the rows you paid for. Cancelling, and what it refunds POST /api/v1/batch-jobs/{jobId}/cancel stops an active job and refunds every render that hadn't completed, totalItems minus completedItems, back to your quota. Submit 400 rows, cancel at 150 done, get 250 renders back. Cancelling a job that already finished is a no-op that refunds nothing, and the accounting is race-safe: a cancel that arrives just as the job completes doesn't refund work that was actually delivered. Deleting is separate. DELETE removes a finished job and its archive but never refunds; cancellation is the operation that settles the bill. When the loop is still right A batch job is for many images from one template, now. It's the wrong shape for one image per event: a voucher the moment someone signs up, an OG image when a post publishes, a ticket when someone pays. Those want the single-render endpoint called from the event, one POST, bytes back. The OG image guide and the spreadsheet-to-API section of the certificates guide cover that shape. The dividing line: if you'd be writing a loop, it should be a batch job. If there's no loop, it shouldn't be. What this doesn't do One template per job. Rows vary the data, not the design. Rendering three different templates is three jobs. Row caps are per plan: 25 rows per job on Free, 100 on Personal, 200 on Studio, 300 on Team, 400 on Business. Bigger datasets get split into multiple jobs, and you can have two active jobs at a time. The result URL expires after an hour. That's a fresh-URL-on-request design, not image hosting; ask again for another one. The archive behind it is kept for 30 days after the job finishes, then deleted — the download answers 410 BATCH_RESULT_EXPIRED rather than a bare 404, and the job's counters and per-row outcomes stay readable indefinitely. Copy the ZIP into your own storage if you need it longer. If you need individually hosted images rather than a ZIP, that's what share links are for. What this costs One render per row, from the same monthly pool as every other render. The free plan's 100 renders cover a real test batch of 25 rows four times over. Personal at $29/month is 5,000 renders with 100-row jobs, and the caps rise from there. Cancelled rows come back; the quota only keeps what was actually rendered.The batch rendering reference documents all seven endpoints, every error code, and the full filename pattern rules, and Completion Callbacks covers signing and retries. For why the API is shaped this way, see the launch note.
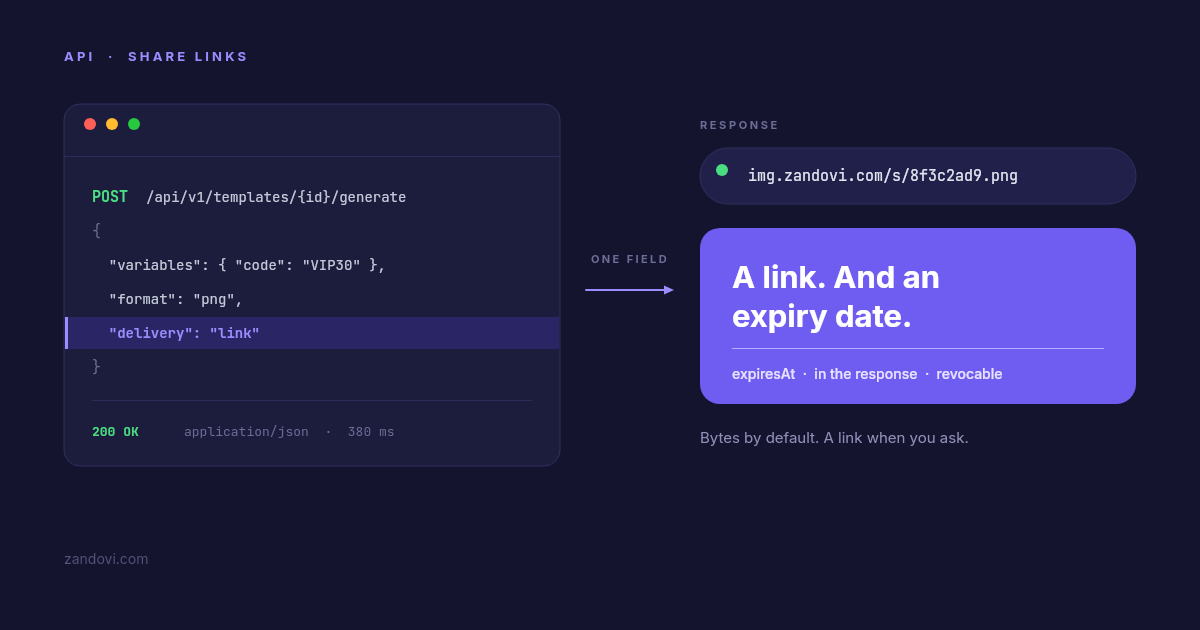
- 21 Aug, 2026
Your Render Came Back as a URL. How Long Does It Last?
You POST a JSON payload to an image API. A second later you get back something like this: { "image_url": "https://cdn.example.com/renders/8f3c2ad9.png" }That's convenient. It's also the end of what most vendors will tell you. The image is now sitting on somebody else's storage, behind somebody else's CDN, under a retention policy you have probably not read, and you are about to paste that URL into an email that goes to fifty thousand people. We build one of the products in this category, so read this with that in mind. What follows is a check we did on ourselves and then on everyone else, in August 2026, working from each vendor's own API documentation. First, the thing we got wrong We had an internal note claiming hosted URLs were a premium feature in this category — something you unlock on a higher plan. We were about to publish that. It isn't true. Of ten vendors we checked, eight return a hosted URL as their default or only response format, and six of those offer it on a free or entry tier with no gate at all. If you're using a rendering API today, you are almost certainly already getting a URL. What is commonly gated to higher tiers is bring-your-own-storage — pointing the renderer at your own S3 bucket instead of theirs. Bannerbear puts it on Enterprise, APITemplate.io on Enterprise, Templated on Scale, Bannerify on Business, Switchboard on Agency. That's a real pattern. It just isn't the same thing as "hosted URLs are premium," and we shouldn't have conflated them. So this post isn't "here's a feature nobody else has." It's the more useful version: here's what to actually check about the URL you're already getting. Question 1: how long does it live? This is the one that surprised us, and it's the reason the post exists. Retention policy is where the documentation in this category thins out fast. Some vendors state a policy clearly:APITemplate.io — one year on the free plan, indefinite on paid while your subscription is active. HTML/CSS to Image — kept as long as your account is active. RenderForm — 14 days on free and pay-as-you-go, persistent on Pro. Switchboard — a flat seven days, on every plan.Others are vague or silent. Bannerbear's duration wasn't something we could pin down from the docs. Placid says images are kept for a limited time without committing to a number. Templated and Abyssale don't appear to state it at all. Note the spread: seven days at one vendor, indefinite at another. Both are defensible policies, and they imply completely different architectures on your side. If you assumed "indefinite" and you're on the seven-day one, your emails develop broken images a week after send, and nothing in your monitoring will tell you. (We keep a running comparison of this category's pricing in What a Rendered Image Actually Costs — retention is the sort of thing that belongs on a pricing page and almost never is.) Zandovi expires links on a plan-based schedule — seven days on free, thirty on Personal, up to a hundred and eighty on Business — and the exact timestamp comes back in the response: { "url": "https://img.zandovi.com/s/8f3c2ad9e1b74c05.png", "expiresAt": "2026-09-23T09:00:00Z" }We'll be direct about the trade here: that's shorter than several competitors. If you want an image to live indefinitely, APITemplate and HCTI will do that and we won't. What we'll do instead is tell you the exact moment it stops, in the response body, so you can store it next to whatever references the URL. Which of those you want depends entirely on the next question. Question 2: is this image supposed to outlive the thing it's about? Most of the confusion here comes from treating "generated image" as one category. It's two. Images that should persist: an OG card referenced in a page's <head>, a product shot, an avatar, anything a crawler will come back for in two years. These want permanent storage — either a vendor that keeps them indefinitely, or your own bucket, which is what the bring-your-own-storage tier exists for. Don't build these on a link that expires. (This is exactly why our OG-image walkthrough takes the bytes and writes them to static assets rather than using a share link.) Images tied to something that itself expires: a voucher graphic, an event badge, a proof you're sending a client, a one-off share. These are the ones where indefinite retention is quietly a liability. A two-year-old link to a 30%-off graphic is still live, still screenshot-able, still being posted to deal forums, long after the offer died. Nobody ever schedules the cleanup. For the second category, expiry isn't a limitation you work around — it's the behaviour you want. A voucher that stops being valid on 23 September and a voucher image that stops loading on 23 September are the same promise, kept consistently, without you writing a lifecycle rule. Question 3: can you delete one? Separate from expiry: if a single image needs to come down now — wrong price, wrong name, customer asked — is there an endpoint for that? Fewer vendors document this than you'd expect. Placid has a documented DELETE /api/rest/images/{id}. Templated has DELETE /v1/render/{id}. For several others we couldn't find one in the API reference at all, which doesn't prove it's absent, but does mean you'd be opening a support ticket rather than making a call. Zandovi's is DELETE /api/v1/shares/{shareId}, on every plan, and it hard-deletes the object rather than hiding it. There's also a Shared Links tab in the editor for people who'd rather click a button, where workspace owners and admins can see and revoke every link in the organization — which matters mostly for the case where someone leaves and their links keep resolving. One honest caveat: shared images are cached at the edge for up to five minutes. Revoking purges that cache, but treat it as "stops being available shortly," not "vanishes this instant." The bonus question: can you still get the bytes? Here's the one place our answer genuinely differs from most of the field, and it's the opposite of what we originally assumed. Most vendors in this category return a URL and nothing else. Bannerbear, Placid, Templated, Abyssale, RenderForm, HTML/CSS to Image and Switchboard all answer with a hosted link; if you want the file itself you fetch that link in a second round trip. A few offer both — APITemplate has an opt-in file export, Bannerify has separate endpoints, Orshot lets you pick url, base64 or binary. Zandovi is in that smaller group, with bytes as the default: # bytes — the default, unchanged since we launched curl -X POST https://app.zandovi.com/api/v1/templates/$TEMPLATE_ID/generate \ -H "X-Api-Key: $ZANDOVI_API_KEY" \ -H "Content-Type: application/json" \ -o voucher.png \ -d '{ "variables": { "first_name": "Sarah", "code": "VIP30" }, "format": "png" }'# a hosted link — add one field curl -X POST https://app.zandovi.com/api/v1/templates/$TEMPLATE_ID/generate \ -H "X-Api-Key: $ZANDOVI_API_KEY" \ -H "Content-Type: application/json" \ -d '{ "variables": { "first_name": "Sarah", "code": "VIP30" }, "format": "png", "delivery": "link" }'Same render, same single charge against your quota. delivery picks how the result comes back, not what it costs. Having both matters more than it sounds. Writing the file to your own storage is a one-step operation when the render hands you bytes, and a fetch-then-write when it hands you a URL. Conversely, putting an image in an email is trivial with a URL and a hosting project with bytes. Most workflows want one or the other, and which one flips depending on the job — sometimes within the same codebase. It also decides how much friction you hit in a no-code tool. Binary responses are the single most common thing people get wrong when calling an image API from n8n, Make or Zapier — leave the response format on JSON and you get an unhelpful parse error. We wrote up the HTTP-node recipe for those platforms, and asking for a link is the shortcut that skips the whole binary-handling problem. Why the URL matters at all: email If you're wondering why anyone cares about the delivery format, transactional email is the sharpest case. Email clients are hostile to every approach except one. Inline data: URIs get stripped by Outlook and ignored by much of the rest. Attaching the image works technically, but it inflates the message and a promotional graphic as an attachment is a good way to get filed somewhere nobody looks. Gmail clips messages over roughly 102 KB, and a clipped message hides your call to action behind a "View entire message" link. What works is boring and has worked for twenty years: <img src="https://img.zandovi.com/s/8f3c2ad9e1b74c05.png" alt="Your £30 voucher" width="600">Which makes the whole flow one function: async function voucherEmail(order) { const res = await fetch( `https://app.zandovi.com/api/v1/templates/${TEMPLATE_ID}/generate`, { method: 'POST', headers: { 'X-Api-Key': process.env.ZANDOVI_API_KEY, 'Content-Type': 'application/json', }, body: JSON.stringify({ variables: { first_name: order.firstName, code: order.voucherCode, expires_at: order.expiresAt, }, format: 'png', delivery: 'link', }), }, ) if (!res.ok) throw new Error(`render failed: ${res.status}`) const share = await res.json() return mailer.send({ to: order.email, subject: 'Your voucher is inside', html: `<img src="${share.url}" alt="Your voucher" width="600">`, }) }Store share.expiresAt next to the order. When someone asks for a resend after it lapses, re-render rather than digging for a dead link. If you're rolling your own renderer Everything above assumes you're using a hosted API. If you're generating images yourself — Satori/@vercel/og, Puppeteer, sharp, node-canvas — then you're in a different position: you get bytes, always, and the entire hosting question is yours. That's the case where "just put it in a bucket" turns into a bucket, a public-access policy, a CDN, a key-naming scheme that doesn't let one customer guess another's filenames, an expiry policy, something that actually enforces it, and an admin path for taking one image down. It's a real afternoon, and then it's a permanent thing you operate. Worth knowing that's the trade before you start, because it's usually invisible in the "generate an OG image in 10 lines" tutorials. What share links are not Three limitations, stated plainly, because finding them out later is worse. Not permanent. Seven to a hundred and eighty days by plan, then the object is deleted rather than archived. For anything that must persist, use delivery: "binary" and your own storage. Not private. Anyone holding the URL can open it — no password, no per-viewer expiry, no referrer check. The token is 256 bits of randomness with no relationship to your template or account, so nobody enumerates them, but unguessable is not the same as secret. Think twice before rendering someone's full name next to their order details into a link you email. Not a CDN you control. Five-minute edge cache, one purge on revoke, fixed response headers. The short version Whatever you're using, three things are worth checking today:How long does the URL live? If the docs don't say, ask support and write the answer down. The range across this category is seven days to indefinite. Can you delete one on demand? Look for a documented DELETE endpoint. Can you get the raw bytes when you need them? Most vendors say no.For Zandovi the answers are: a plan-based window returned in every response, yes via DELETE /api/v1/shares/{shareId}, and yes — bytes are still the default.Share links in the API reference Sharing from the editorVendor behaviour above was checked against each vendor's own API documentation and pricing pages in August 2026. These change often — verify before you commit to anything on the strength of a blog post, including this one.
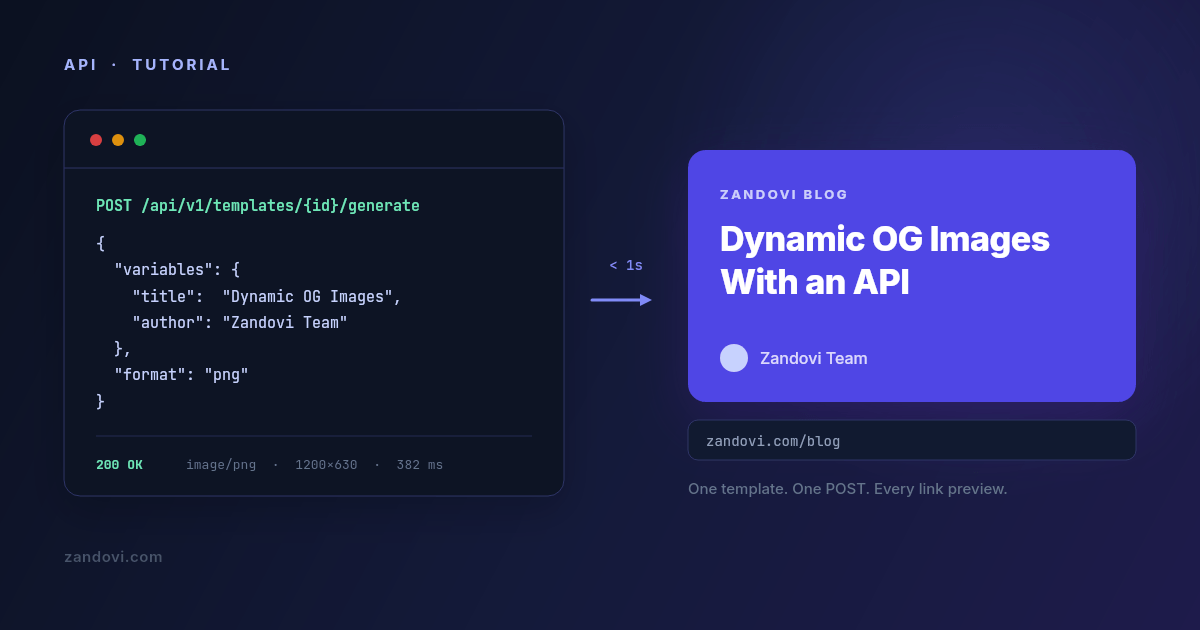
- 04 Aug, 2026
Dynamic OG Images With an API, Without Running a Headless Browser
Every content site eventually needs the same thing: a link preview image per page, with the page's own title on it. Share a post on X, LinkedIn or Slack and the card that appears is doing real work. It's the difference between a link that gets clicked and a link that scrolls past. Making one by hand is fine. Making four hundred is not. So the question becomes how you generate them, and the answer you find online is usually one of three, each with a cost that isn't obvious until you're maintaining it. The three usual approaches Hand-made in a design tool. Highest quality, zero automation. Works until you publish weekly, at which point it becomes a recurring chore nobody wants and eventually gets skipped. A headless browser. Write the card as HTML and CSS, load it in Puppeteer or Playwright, screenshot the viewport. This works. It's how a lot of production systems do it, and it's genuinely the right answer if you already run a browser farm for other reasons. What you're signing up for is a Chromium binary in your deploy artifact, cold starts measured in seconds, memory limits that bite at the worst time, and a font-loading bug on the day you switch base images. The rendering isn't the hard part. Operating the thing that renders is. A JSX-to-SVG renderer like Satori (what @vercel/og uses under the hood). Much lighter than a browser and a genuinely good fit for simple cards. The trade-off is that you're writing your design in a constrained subset of CSS, in code, and every visual change is a code change and a deploy. If a non-engineer ever wants to adjust the layout, they can't. There's a fourth option that gets less attention: treat the card as a designed template with named variables, and render it over HTTP. The design lives in a visual editor, the code sends values. That's the approach this post walks through, using Zandovi's API. What the flow looks likeDesign the card once in the editor, marking the parts that change (title, author, category) as variables. Send a POST with those values. Get PNG bytes back.You don't run a browser, there's no build step, and changing the design doesn't need a redeploy. Here's the whole request: curl -X POST https://app.zandovi.com/api/v1/templates/$TEMPLATE_ID/generate \ -H "X-Api-Key: $ZANDOVI_API_KEY" \ -H "Content-Type: application/json" \ -o og.png \ -d '{ "variables": { "title": "Dynamic OG Images With an API", "author": "Zandovi Team", "category": "Engineering" }, "format": "png" }'That's it. The response body is the image itself: raw bytes, Content-Type: image/png, no JSON wrapper to unpack and no second round trip. (That's worth noting, because most render APIs answer with a hosted URL instead and make you fetch it. For OG cards, bytes are what you want: the image has to keep resolving for as long as the page is shared, so it belongs in your own static assets rather than on someone else's expiring link. Zandovi does have a delivery: "link" option — it's just the wrong tool for this particular job. Where it is the right tool, and what to check about any vendor's hosted URLs, is covered in Your Render Came Back as a URL. How Long Does It Last?) Step 1: design the card Create a canvas at 1200×630, the size every platform expects for a link preview. Lay out the background, any logo or gradient, and the text blocks. Then mark the text that changes as a variable. A variable has a name (the key you'll send in JSON), a required flag, and optionally a default value and a list of allowed values. For an OG card you'll typically want:Variable Element Notestitle text The one that matters. Turn on auto-fit so long titles shrink instead of overflowing.author text Give it a sensible default so a missing value doesn't render an empty box.category text Optional. Set its Allowed values to restrict it to your real categories.The auto-fit setting deserves a moment. Blog titles vary wildly in length, and the single most common failure mode for generated cards is a long title running off the canvas or being silently clipped. Auto-fit takes a minimum and maximum font size and picks the largest that fits the box, so a six-word title renders big and a twenty-word title renders smaller but complete. Step 2: get an API key In the app, open Settings → API Keys, name a key (og-images is a fine name) and create it. The key is shown exactly once, so copy it straight into your secret store. Keys are scoped to a workspace and inherit that workspace's quota. export ZANDOVI_API_KEY="your_api_key"Never put this in client-side code. Anyone holding the key can spend your renders. Step 3: ask the template what it accepts Before wiring anything up, have the template tell you its own schema. This avoids the classic bug where your code sends postTitle and the template expects title, and you find out from a support ticket three weeks later: curl https://app.zandovi.com/api/v1/templates/$TEMPLATE_ID \ -H "X-Api-Key: $ZANDOVI_API_KEY"The response includes a variables array with each variable's name, type, whether it's required, and its validation rules. Read endpoints like this one don't consume render quota, so you can call it freely, including from a test that asserts your code and your template still agree. That last point is worth doing. A one-line test that fetches the schema and compares the variable names against the object your code builds will catch a designer renaming a field long before it reaches production. Step 4: render from your app Here's a small helper in TypeScript: type OgFields = { title: string; author: string; category?: string; };export async function renderOgImage(fields: OgFields): Promise<Buffer> { const res = await fetch( `https://app.zandovi.com/api/v1/templates/${process.env.OG_TEMPLATE_ID}/generate`, { method: "POST", headers: { "X-Api-Key": process.env.ZANDOVI_API_KEY!, "Content-Type": "application/json", }, body: JSON.stringify({ variables: fields, format: "png", }), }, ); if (!res.ok) { // Errors are RFC 9457 problem+json const problem = await res.json(); throw new Error( `OG render failed (${problem.status} ${problem.code}): ${problem.detail} ` + `[requestId=${problem.requestId}]`, ); } return Buffer.from(await res.arrayBuffer()); }Two details in there are load-bearing. The first is that there's no server-side deduplication on this endpoint, so calling twice costs twice. Every POST to the generate endpoint is a fresh render against your quota, even if the variables are byte-identical to the last one. That makes "don't call it twice" your job, not the server's. Derive a stable key from the content, like the post slug or a hash of the fields, check your own cache or storage first, and only call the API on a miss. A retried build or a double-fired webhook is otherwise a second render. (The batch endpoint does take an idempotency key, which is also the answer to the backfill problem: generating cards for four hundred existing posts is one batch job with a {slug} filename pattern, not four hundred calls through this function.) The second is requestId. Every error body carries one, and every successful response carries an X-Request-Id header. Put it in your logs. It's the single piece of information that turns "images sometimes fail" into a traceable incident. Where to call this from The tempting design is a route handler that renders on demand: /og/[slug].png calls the API and streams the result. Don't do that without a cache in front of it. Crawlers, preview bots and link unfurlers hit OG images repeatedly and unpredictably, and each uncached hit is a render off your quota. Two patterns that hold up: Render at publish time. When a post is created or updated, render the card once, upload the bytes to your object storage or CDN, and store the resulting URL on the post record. generateMetadata then just returns a string. One render per post per edit, and serving costs you nothing: export async function generateMetadata({ params }): Promise<Metadata> { const post = await getPost(params.slug); return { title: post.title, openGraph: { images: [{ url: post.ogImageUrl, width: 1200, height: 630 }], }, }; }Render on demand, then cache hard. If you'd rather not add a publish hook, keep the route handler but put your CDN in front of it with a long Cache-Control, and write the rendered bytes to storage on the first miss so the second miss never reaches the API. Because nothing deduplicates on the server side, every cache miss is a paid render. That's exactly why the publish-time pattern above is the safer default.Handling the errors that actually happen Three you should code for. A 400 with code: VALIDATION_ERROR means a required variable is missing or a value failed the template's validation. The details object maps each offending variable name to what was wrong with it. That's a bug in your code rather than a transient failure, so don't retry it. A 429 with code: RATE_LIMIT_EXCEEDED is short-term throttling. Back off and retry, honoring Retry-After. A 429 with code: QUOTA_EXCEEDED means you're out of renders for the month, and retrying won't help until the reset. Branch on the code field rather than the status alone, or your backoff loop will spin pointlessly for two weeks. Every successful render also returns X-Quota-Remaining and X-Quota-Reset. Emitting X-Quota-Remaining as a gauge metric costs you nothing and means you find out you're running low from a dashboard rather than from broken link previews. Failed renders are refunded automatically, so a 502 from the rendering service doesn't quietly cost you anything. What it costs For OG images specifically, the volume is low: one render per post, plus one per edit. A site publishing weekly generates maybe a hundred renders a year. That sits inside the free tier (100 renders a month, no card) with room to spare. The volume argument only shows up when OG images are one job among several. If the same account is also generating certificates, email graphics or social variants, you're looking at the paid tiers: $29/month for 5,000 renders, and manual exports from the editor don't count against that on any paid plan. When this is the wrong tool Be honest about the fit. If the card has to reflect live data at request time, like a leaderboard position or a current price, this isn't it. Caching is what makes the approach cheap, and live data is what breaks caching. A JSX renderer running in your own edge function fits better. If your card is genuinely simple, a title on a solid background and nothing else, @vercel/og will do it in about thirty lines and one dependency. Reach for a template service when the design has enough going on that you want it maintained in an editor rather than in JSX. And if you already operate a browser farm, adding an external dependency to save a screenshot call isn't obviously a win. Where this approach earns its keep is the case in between: a card that's designed rather than laid out in code, that someone non-technical might want to restyle next quarter, and that you'd rather not redeploy to change.Want to try it? The API quickstart goes from key to first rendered PNG in a few minutes, and the free plan includes 100 renders a month with no card required.