Showing Posts From
Api
- 15 Aug, 2026
Generating Images Inside an n8n, Make or Zapier Workflow (With Just an HTTP Node)
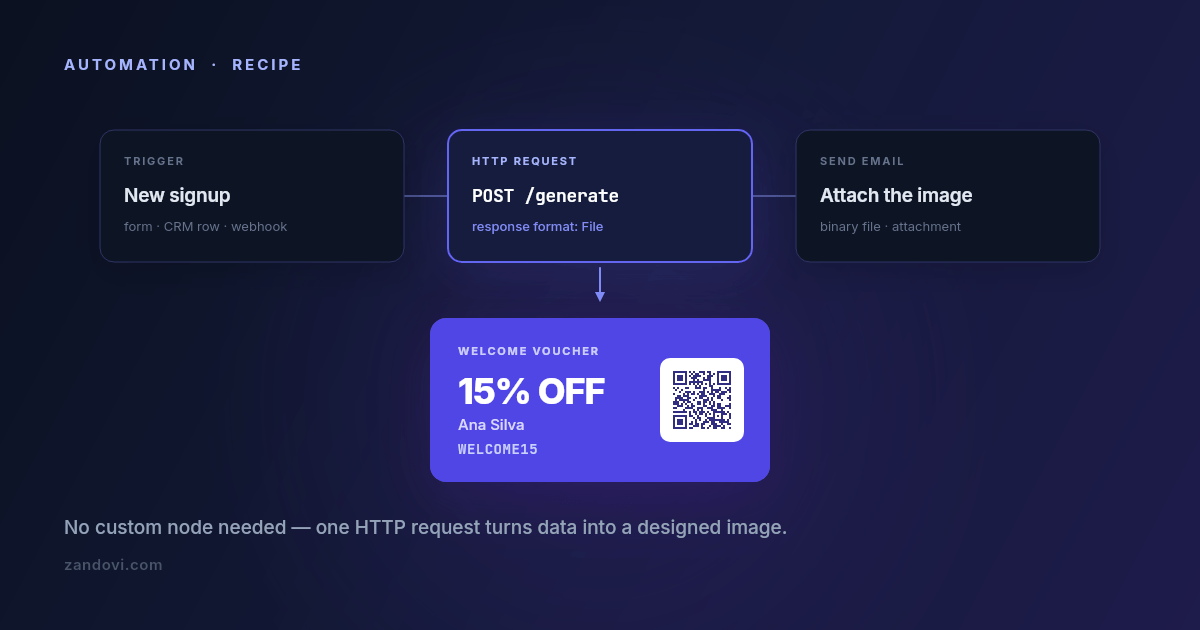
Automation platforms are very good at moving text and data around. A form submission becomes a database row becomes a Slack message becomes an email, and none of it takes code. Then someone asks for the email to include a personalized voucher with the recipient's name and a scannable code on it, and the workflow stops. Every node in the chain handles strings and JSON; none of them draws. The usual workarounds are all bad in the same way. Pre-generating a few hundred images defeats the point of personalizing them. Passing the data to a designer puts a human in a loop that was supposed to be automatic. Spinning up a small rendering service means you now operate a small rendering service. The fix is one node: an HTTP request that sends your values and receives an image back. Up front: there's no native node yet We don't ship an n8n community node, a Make app, or a Zapier integration today. It's on the roadmap and the n8n one is first, but it doesn't exist as you read this, and telling you otherwise would waste your afternoon. What does exist is a plain REST API that returns image bytes, which every one of these platforms can call with its built-in HTTP module. That's what this post sets up. It's four or five fields of configuration, and it works today. The request you're making One endpoint does the work: POST https://app.zandovi.com/api/v1/templates/{templateId}/generateWith a header for your API key, a JSON body of variable values, and a response that is the image itself: raw bytes, not a JSON envelope with a URL inside it. { "variables": { "customer_name": "Ana Silva", "discount_code": "WELCOME15", "expires_at": "30 Sep 2026", "voucher_qr": "https://example.com/redeem/WELCOME15" }, "format": "png", "options": { "scale": 2 } }The one design decision to get right before you touch the workflow: which parts of the image are variables. Any text, image, QR code or barcode element in the template can be one. In the example above, voucher_qr is a QR element whose content comes from the request, so every generated voucher carries its own redemption link. You'll also want the template's exact variable names. Ask the template itself: GET https://app.zandovi.com/api/v1/templates/{templateId}The response lists each variable's name, type and whether it's required. Read calls like this don't consume render quota, so you can call it as often as you like while building. n8n n8n is the most straightforward of the three because its HTTP Request node handles binary responses natively. Start by storing the key as a credential. Create a Header Auth generic credential with name X-Api-Key and your key as the value. Don't paste the key into the node. A credential keeps it out of exported workflow JSON, which matters the first time you share a workflow with someone. Then add an HTTP Request node and configure it:Field ValueMethod POSTURL https://app.zandovi.com/api/v1/templates/YOUR_TEMPLATE_ID/generateAuthentication Generic Credential Type → Header Auth → the credential aboveSend Body on, JSONBody the JSON above, with expressions in place of literalsResponse → Format FileThat last setting is the one people miss. Left on the default, n8n tries to parse image bytes as JSON and you get an unhelpful error. Set the response format to File and the image arrives as binary data on the item, ready for the next node. Use expressions for the values rather than hard-coding them, so they pull from earlier nodes: {{ $json.customer_name }} {{ $json.discount_code }} {{ new Date().toLocaleDateString('en-GB', { day: 'numeric', month: 'short', year: 'numeric' }) }}Then do something with it. The binary property flows straight into a Send Email node as an attachment, a Google Drive upload, a Slack file post, or an S3 node. This is the payoff: the image is now just another piece of data in the workflow.Make.com Same shape, different labels. Use the HTTP → Make a request module, with the method set to POST and the URL pointing at the generate endpoint. Add X-Api-Key and Content-Type headers, set the body type to Raw or JSON with your variable values mapped in from earlier modules, and turn Parse response off. Leaving "Parse response" off is the equivalent of n8n's File setting. It tells Make to keep the binary payload intact rather than trying to interpret it. The result appears as file data that downstream modules (Email, Google Drive, Dropbox) accept directly. Zapier Zapier is the fiddliest of the three, because its webhook step is built around text and JSON responses rather than binary payloads. The Webhooks by Zapier → Custom Request action (a premium feature) will make the POST. What you do with the response depends on what comes next: attaching raw binary to a later step is where people typically run into trouble. Two paths tend to work better. You can use a Code by Zapier step to make the request and handle the response yourself, base64-encoding it if the next step needs a string. Or you can render, store, then link: push the image into your own storage and pass the resulting URL along, so every subsequent Zapier step is handling a plain string. If your automation lives entirely in Zapier and images are central to it, be honest with yourself about whether the extra steps are worth it versus running this one piece elsewhere. Three details that will save you a support ticket Deduplicate in the workflow, because the API won't do it for you. There is no idempotency key: every call to the generate endpoint renders again and spends another render, even when the variables are identical. Automation platforms retry steps more often than people expect, on their own schedule, so a step that looks like it ran once may have run three times. Guard it on your side. Store something per event, like a rendered_at timestamp or the resulting file URL on the record that triggered the workflow, then put an IF node in front of the HTTP request that skips it when that field is already set. It's two extra nodes, and it's the difference between a quota you can predict and one you can't explain. Branch on the error code, not just the status. Two different 429s exist. One has code: RATE_LIMIT_EXCEEDED and means slow down, so retry after a short pause. The other has code: QUOTA_EXCEEDED and means you're out of renders for the billing period, where retrying achieves nothing until the reset. A workflow that treats them identically will either hammer the endpoint pointlessly for two weeks or give up on a transient blip. 502 and 503 are worth an exponential backoff. n8n's "Retry On Fail" and Make's error-handler routes both cover this without custom logic. Failed renders are refunded automatically, so a retry after a genuine service error doesn't cost you twice. Watch the quota headers. Every successful render returns X-Quota-Remaining and X-Quota-Reset. A tiny branch in the workflow that posts to Slack when remaining drops below some threshold turns "the vouchers stopped sending" into "heads up, we're at 400 renders left". Cheap to build, disproportionately useful. Recipes worth stealing Welcome voucher on signup. A new row in your CRM or a new form submission triggers the flow, which generates a voucher image carrying the customer's name, a code, and a QR pointing at the redemption URL, then attaches it to the welcome email. Personalized, and nobody touched it. Certificate on course completion. A completion webhook from your LMS triggers a PDF certificate at 300 DPI with the learner's name and a verification QR, which gets emailed with a copy dropped in Drive. This is the automated counterpart to the spreadsheet batch flow, and it's the same template. Social card on new content. A new CMS entry generates a branded card with the title and author, which goes to Slack for approval or straight to the scheduling tool. The design lives in the editor, so marketing can restyle it without asking anyone to redeploy. What to know before you build on this There's no native node yet, so you're wiring HTTP modules. That's a handful of fields, but it isn't a one-click install, and the UI labels above move slightly between platform versions. The concepts hold; the exact field names may not. Rate limits are real. The API throttles per second, so a loop firing hundreds of parallel requests will hit it. Keep concurrency modest and let the retry logic handle the rest. Renders are metered, including the ones your workflow generated by accident during testing. The free tier's 100 renders a month is enough to build and test a workflow properly; a production automation firing on every signup needs a paid plan. Which brings up the last one: watch your test runs. The single fastest way to burn a free tier is a misconfigured trigger firing 80 times while you debug. Pin sample data while building and only go live once the node is right.The API quickstart has the same request in curl, JavaScript and Python if you'd rather test it outside the workflow first. And if you'd find a native n8n node useful, tell us. The order we build integrations in is decided by who asks.
- 12 Aug, 2026
What a Rendered Image Actually Costs: Image Generation API Pricing in 2026
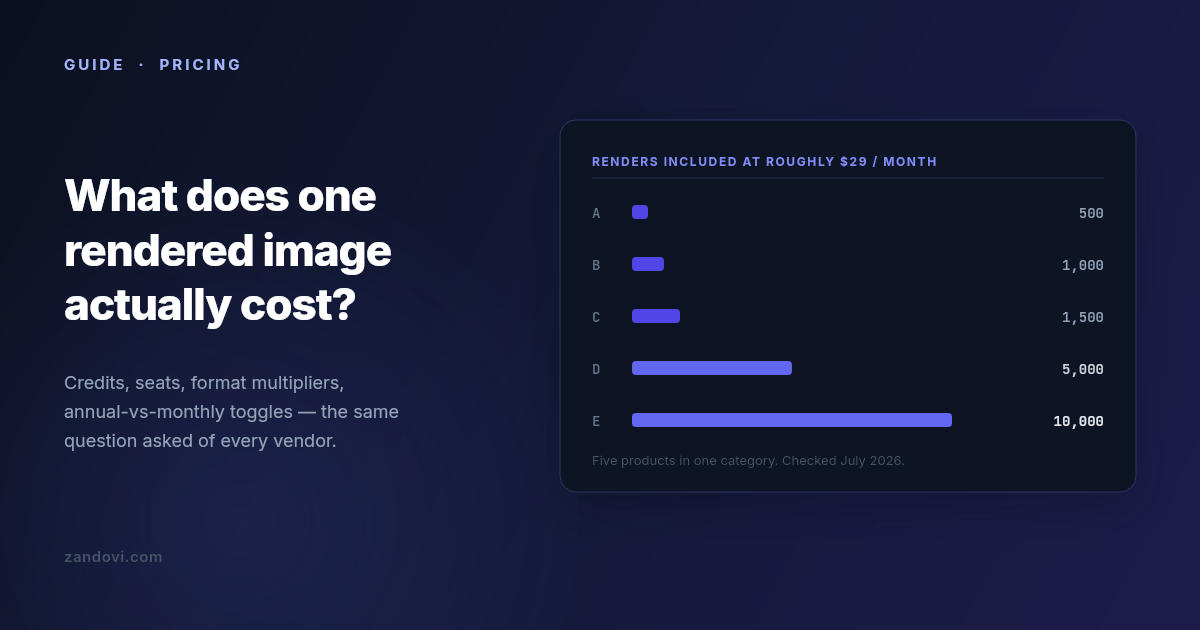
We build one of the products in this category, so read this with that in mind. What follows is the comparison we had to do for ourselves, written down. Every number is from the vendor's own public pricing page, checked in July 2026, and linked so you can verify it. Linked also so you can catch it when it goes stale, because these pages change every few months. Why these pricing pages are hard to compare Five things make a straight comparison awkward, and only some of them are accidental. Credits are not renders. Some vendors charge one credit per image and some charge multiples for certain outputs. A PDF might cost two credits per page. A video costs by duration. If your workload is mostly PDFs, a plan advertising 5,000 credits might deliver 2,500 documents. Annual prices are shown as if they were monthly. The large number on the page is often the annual-billing rate divided by twelve. Paying month to month costs meaningfully more, commonly 15-25%. Check which toggle is selected before you write the number down. Some vendors meter per seat. A plan at $45 per seat with 450 credits per seat looks cheap next to a $149 flat plan until you have four people, at which point it isn't. Free tiers range from generous to decorative. "Free" sometimes means a recurring monthly allowance and sometimes means a one-time bundle of trial credits that never refills. Those are very different things when you're evaluating. What counts as a render varies. On most platforms, exporting an image by hand from the web editor consumes the same credit an API call would. On a few, it doesn't. If your team does a lot of manual design work alongside the automated pipeline, this is the difference that dominates the bill. The number to compare Ignore the plan names. Compute cost per 1,000 renders at the tier you'd actually be on. Not the cheapest tier, and not the enterprise one, but the one that covers your realistic monthly volume with maybe 30% headroom. Then check whether your specific output type carries a multiplier. Entry tiers, July 2026 Prices as listed on each vendor's public pricing page in July 2026. Where a vendor shows annual pricing by default, the monthly rate is noted.Product Entry plan Renders included ≈ Cost / 1,000 Free tierPlacid $19/mo 500 credits ~$38 Trial creditsBannerbear $49/mo 1,000 credits ~$49 30-credit trialTemplated $29/mo 1,000 credits ~$29 One-time 50 creditsAPITemplate.io $29/mo billed annually ($35 monthly) 1,500 renders ~$19-23 50/moZandovi $29/mo 5,000 renders ~$5.80 100/moAnd the higher tiers, where the per-render economics usually improve:Product Mid tier Renders ≈ Cost / 1,000Placid $39/mo 2,500 ~$16APITemplate.io $69/mo 9,000 ~$7.70Bannerbear $149/mo 10,000 ~$15Zandovi $79/mo 25,000 ~$3.20The part most comparisons leave out If you stop reading at the table above, you'll conclude that the established vendors are expensive and everything else is cheap. That's not quite the shape of the market in 2026, because there's a whole second group of products that compete purely on render economics. As of July 2026, that group includes Imejis (around $24.99 for 10,000 renders, with 100 free per month), Bannerify ($29 for 10,000, also with a recurring free tier), RenderForm (from about $9 for 250, with credit rollover), HTML/CSS to Image (around $14 for 1,000) and Switchboard (around $19 for 1,000). Look at those numbers next to the table and the honest conclusion is that on price per render alone, the budget group wins, and nobody in the established group beats them. That includes us. Bannerify sells 10,000 renders for the same $29 that buys 5,000 from Zandovi. We're saying this out loud because it's the thing you'd find in twenty minutes anyway, and because it points at the actual question. If cost per render were the only variable, this would be a one-line market and the cheapest vendor would have all of it. It isn't, so the useful question is what you give up at each price. What you're actually buying at each price point The budget group is typically API-first. You give it HTML/CSS or a simple template definition and it gives you an image, fast and cheap. What's usually thin or absent: a real visual editor a non-engineer can use, batch processing from a spreadsheet, print-ready output at a controlled DPI, team accounts with roles, and template management beyond a list. If your rendering need is well-defined, high-volume, and owned entirely by engineers, this group is very hard to argue against. The established group charges more per render and sells operational maturity: years of uptime history, mature integration ecosystems, video and GIF generation in Bannerbear's case, support you can escalate to. If you're integrating rendering into a product your customers depend on, that history is worth paying for and the per-render delta is probably noise in your budget. Seat-metered products like Abyssale price around teams rather than volume. If your usage is five designers each making a moderate number of assets, that model can work out cheaper than volume pricing. If it's one server making 100,000 calls, it won't. Five questions that change the answer more than the headline price Does your output type carry a multiplier? If you generate PDFs, ask specifically. One credit per page versus two per page doubles your bill and appears nowhere in the headline number. What happens at the limit? Most of this category hard-stops when you exhaust your quota, and requests start failing until the reset. A few sell overage credits instead. Neither is wrong, but they fail differently. A hard stop means a broken feature and an upgrade decision at 2am, while overage means a surprise on the invoice. Know which one you've bought. Do editor exports count? If your team designs in the web editor and exports by hand, check whether those exports draw from the same pool as your API calls. On most platforms they do. Is the free tier recurring? A monthly allowance lets you build, test in CI, and run a small side project indefinitely. A one-time trial bundle lets you evaluate for an afternoon. Both are legitimate; only one is useful to develop against. How many templates can you have? Template caps exist on some entry plans and are a recurring complaint in reviews of this category. If you're generating across a dozen designs, a three-template cap ends the evaluation regardless of render price. A rough decision guide If you need images inside a product, at volume, and engineers own the whole pipeline, start with the budget group. The economics are genuinely better and the missing features are ones you may not need. If you need a track record, integrations that already exist, or video, Bannerbear and Placid are the incumbents for a reason. Pay the premium and stop thinking about it. If non-engineers need to own the designs, you need a real editor, and the field narrows sharply. Most cheap renderers are code-first by design. And if your workload is bursty and human-driven, a few hundred certificates after an event or a set of vouchers per campaign rather than steady API traffic, look for spreadsheet batch processing and check what a manual export costs you. Where we fit, stated plainly Zandovi is $29/month for 5,000 renders, with 100 free per month on a recurring basis. Against the category leaders that's several times more renders per dollar. Against the budget flank it isn't the cheapest, and we're not going to pretend otherwise. What we're actually built around is the combination: a full visual canvas editor where any text, image, QR code or barcode can be a variable; spreadsheet batch generation that outputs a ZIP; print-ready PDF at 300 DPI with no format multiplier; and unlimited manual editor exports on every paid plan, because metering someone's design work by the click never made sense to us. If you need none of that, buy renders from whoever sells them cheapest. That's a real answer, and for a lot of workloads it's the right one. Verify before you commit Every number here has a date on it and a link next to it, and that's deliberate. This category re-prices constantly: over the twelve months to July 2026 at least three of the products named above restructured their plans. Before you sign up for anything, open the linked pricing page and confirm the number yourself, paying attention to the annual/monthly toggle. And build a small proof of concept on the free tier before you commit to a year. Cost per render is easy to compare on a spreadsheet and rarely the thing that decides whether a tool works for you.Sources: Bannerbear pricing, Placid pricing, APITemplate.io pricing, Templated pricing, Zandovi pricing. All figures checked July 2026.
- 04 Aug, 2026
Dynamic OG Images With an API, Without Running a Headless Browser
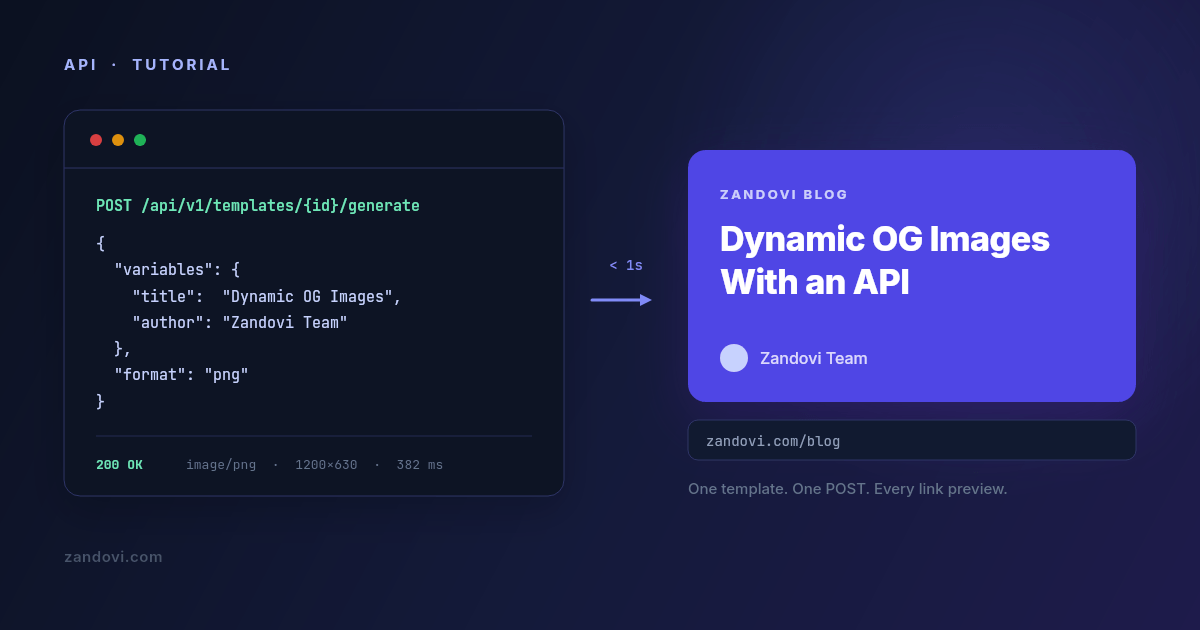
Every content site eventually needs the same thing: a link preview image per page, with the page's own title on it. Share a post on X, LinkedIn or Slack and the card that appears is doing real work. It's the difference between a link that gets clicked and a link that scrolls past. Making one by hand is fine. Making four hundred is not. So the question becomes how you generate them, and the answer you find online is usually one of three, each with a cost that isn't obvious until you're maintaining it. The three usual approaches Hand-made in a design tool. Highest quality, zero automation. Works until you publish weekly, at which point it becomes a recurring chore nobody wants and eventually gets skipped. A headless browser. Write the card as HTML and CSS, load it in Puppeteer or Playwright, screenshot the viewport. This works. It's how a lot of production systems do it, and it's genuinely the right answer if you already run a browser farm for other reasons. What you're signing up for is a Chromium binary in your deploy artifact, cold starts measured in seconds, memory limits that bite at the worst time, and a font-loading bug on the day you switch base images. The rendering isn't the hard part. Operating the thing that renders is. A JSX-to-SVG renderer like Satori (what @vercel/og uses under the hood). Much lighter than a browser and a genuinely good fit for simple cards. The trade-off is that you're writing your design in a constrained subset of CSS, in code, and every visual change is a code change and a deploy. If a non-engineer ever wants to adjust the layout, they can't. There's a fourth option that gets less attention: treat the card as a designed template with named variables, and render it over HTTP. The design lives in a visual editor, the code sends values. That's the approach this post walks through, using Zandovi's API. What the flow looks likeDesign the card once in the editor, marking the parts that change (title, author, category) as variables. Send a POST with those values. Get PNG bytes back.You don't run a browser, there's no build step, and changing the design doesn't need a redeploy. Here's the whole request: curl -X POST https://app.zandovi.com/api/v1/templates/$TEMPLATE_ID/generate \ -H "X-Api-Key: $ZANDOVI_API_KEY" \ -H "Content-Type: application/json" \ -o og.png \ -d '{ "variables": { "title": "Dynamic OG Images With an API", "author": "Zandovi Team", "category": "Engineering" }, "format": "png" }'That's it. The response body is the image itself: raw bytes, Content-Type: image/png, no JSON wrapper to unpack and no hosted URL to fetch in a second round trip. Step 1: design the card Create a canvas at 1200×630, the size every platform expects for a link preview. Lay out the background, any logo or gradient, and the text blocks. Then mark the text that changes as a variable. A variable has a name (the key you'll send in JSON), a required flag, and optionally a default value and a list of allowed values. For an OG card you'll typically want:Variable Element Notestitle text The one that matters. Turn on auto-fit so long titles shrink instead of overflowing.author text Give it a sensible default so a missing value doesn't render an empty box.category text Optional. Set its Allowed values to restrict it to your real categories.The auto-fit setting deserves a moment. Blog titles vary wildly in length, and the single most common failure mode for generated cards is a long title running off the canvas or being silently clipped. Auto-fit takes a minimum and maximum font size and picks the largest that fits the box, so a six-word title renders big and a twenty-word title renders smaller but complete. Step 2: get an API key In the app, open Settings → API Keys, name a key (og-images is a fine name) and create it. The key is shown exactly once, so copy it straight into your secret store. Keys are scoped to a workspace and inherit that workspace's quota. export ZANDOVI_API_KEY="your_api_key"Never put this in client-side code. Anyone holding the key can spend your renders. Step 3: ask the template what it accepts Before wiring anything up, have the template tell you its own schema. This avoids the classic bug where your code sends postTitle and the template expects title, and you find out from a support ticket three weeks later: curl https://app.zandovi.com/api/v1/templates/$TEMPLATE_ID \ -H "X-Api-Key: $ZANDOVI_API_KEY"The response includes a variables array with each variable's name, type, whether it's required, and its validation rules. Read endpoints like this one don't consume render quota, so you can call it freely, including from a test that asserts your code and your template still agree. That last point is worth doing. A one-line test that fetches the schema and compares the variable names against the object your code builds will catch a designer renaming a field long before it reaches production. Step 4: render from your app Here's a small helper in TypeScript: type OgFields = { title: string; author: string; category?: string; };export async function renderOgImage(fields: OgFields): Promise<Buffer> { const res = await fetch( `https://app.zandovi.com/api/v1/templates/${process.env.OG_TEMPLATE_ID}/generate`, { method: "POST", headers: { "X-Api-Key": process.env.ZANDOVI_API_KEY!, "Content-Type": "application/json", }, body: JSON.stringify({ variables: fields, format: "png", }), }, ); if (!res.ok) { // Errors are RFC 9457 problem+json const problem = await res.json(); throw new Error( `OG render failed (${problem.status} ${problem.code}): ${problem.detail} ` + `[requestId=${problem.requestId}]`, ); } return Buffer.from(await res.arrayBuffer()); }Two details in there are load-bearing. The first is that there's no server-side deduplication, so calling twice costs twice. The API has no idempotency key. Every POST to the generate endpoint is a fresh render against your quota, even if the variables are byte-identical to the last one. That makes "don't call it twice" your job, not the server's. Derive a stable key from the content, like the post slug or a hash of the fields, check your own cache or storage first, and only call the API on a miss. A retried build or a double-fired webhook is otherwise a second render. The second is requestId. Every error body carries one, and every successful response carries an X-Request-Id header. Put it in your logs. It's the single piece of information that turns "images sometimes fail" into a traceable incident. Where to call this from The tempting design is a route handler that renders on demand: /og/[slug].png calls the API and streams the result. Don't do that without a cache in front of it. Crawlers, preview bots and link unfurlers hit OG images repeatedly and unpredictably, and each uncached hit is a render off your quota. Two patterns that hold up: Render at publish time. When a post is created or updated, render the card once, upload the bytes to your object storage or CDN, and store the resulting URL on the post record. generateMetadata then just returns a string. One render per post per edit, and serving costs you nothing: export async function generateMetadata({ params }): Promise<Metadata> { const post = await getPost(params.slug); return { title: post.title, openGraph: { images: [{ url: post.ogImageUrl, width: 1200, height: 630 }], }, }; }Render on demand, then cache hard. If you'd rather not add a publish hook, keep the route handler but put your CDN in front of it with a long Cache-Control, and write the rendered bytes to storage on the first miss so the second miss never reaches the API. Because nothing deduplicates on the server side, every cache miss is a paid render. That's exactly why the publish-time pattern above is the safer default.Handling the errors that actually happen Three you should code for. A 400 with code: VALIDATION_ERROR means a required variable is missing or a value failed the template's validation. The details object maps each offending variable name to what was wrong with it. That's a bug in your code rather than a transient failure, so don't retry it. A 429 with code: RATE_LIMIT_EXCEEDED is short-term throttling. Back off and retry, honoring Retry-After. A 429 with code: QUOTA_EXCEEDED means you're out of renders for the month, and retrying won't help until the reset. Branch on the code field rather than the status alone, or your backoff loop will spin pointlessly for two weeks. Every successful render also returns X-Quota-Remaining and X-Quota-Reset. Emitting X-Quota-Remaining as a gauge metric costs you nothing and means you find out you're running low from a dashboard rather than from broken link previews. Failed renders are refunded automatically, so a 502 from the rendering service doesn't quietly cost you anything. What it costs For OG images specifically, the volume is low: one render per post, plus one per edit. A site publishing weekly generates maybe a hundred renders a year. That sits inside the free tier (100 renders a month, no card) with room to spare. The volume argument only shows up when OG images are one job among several. If the same account is also generating certificates, email graphics or social variants, you're looking at the paid tiers: $29/month for 5,000 renders, and manual exports from the editor don't count against that on any paid plan. When this is the wrong tool Be honest about the fit. If the card has to reflect live data at request time, like a leaderboard position or a current price, this isn't it. Caching is what makes the approach cheap, and live data is what breaks caching. A JSX renderer running in your own edge function fits better. If your card is genuinely simple, a title on a solid background and nothing else, @vercel/og will do it in about thirty lines and one dependency. Reach for a template service when the design has enough going on that you want it maintained in an editor rather than in JSX. And if you already operate a browser farm, adding an external dependency to save a screenshot call isn't obviously a win. Where this approach earns its keep is the case in between: a card that's designed rather than laid out in code, that someone non-technical might want to restyle next quarter, and that you'd rather not redeploy to change.Want to try it? The API quickstart goes from key to first rendered PNG in a few minutes, and the free plan includes 100 renders a month with no card required.